Batch Processing
Working with Batches
Workflow in Data Integrator allows you to divide the dataset into batches and then process it. Batch processing is mainly used to simplify many ETL operations like Missing value Imputation, expression, and validating data. You can specify the batch size called Chunk. Let's take a look at batch processing step by step
Batch Processing Steps
- Click on three dots (
 ) on the right-hand corner of the Data Integrator landing page. The batch processing option is displayed.
 - Click on batch processing option, and the following popup is displayed
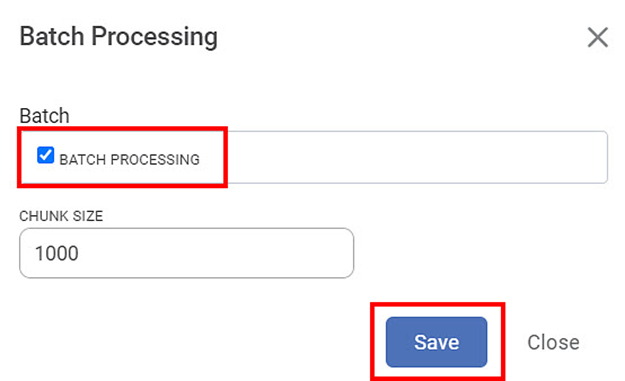
- The default chunk size is 10000. If you remove it and change it to zero, you will get an error message. The batches are created depending on the chunk size.
- The data page will be displayed as follows
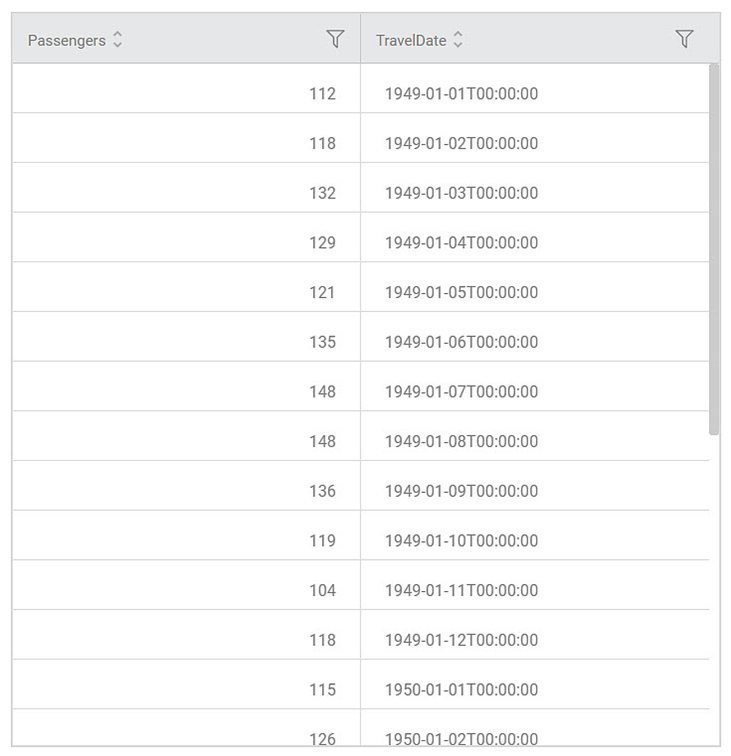
- The records are processed as per mentioned batch size. When you explore the output, you will see all the processed data together. You can view maximum 10000 records per page.
- The pagination is applied when the dataset contains more than 1000 records.
Advantages
- Processing becomes faster. It improves the speed of many ETL operations like Missing value Imputation, expression, Cleansing, and model testing.
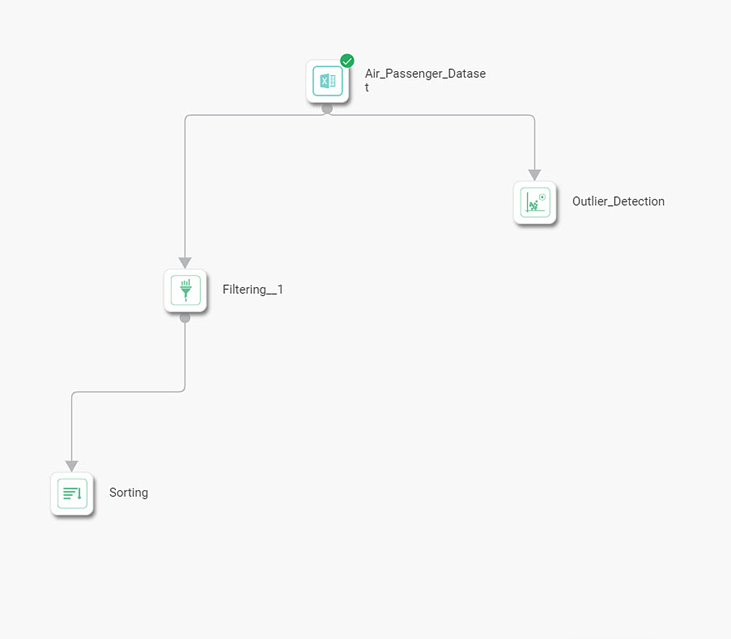
- The parallel processing becomes faster. Consider the following workflow.
- Dataset reads the data from the file.
- You build an expression and save it in the output file in one process.
- In another process you build the Model.
- When you apply batch processing, both processes run concurrently.
- Following figure explains the parallel processing.
- You are allowed to explore the model when it is processing.
Limitations
- Apply Batch processing only on Workflow.
- Don't apply Batch processing in the case of entire column operations like average, and totals.
- Batch processing is not allowed on the datasets generated using the following techniques
- SSAS RDBMS
- JSON file format
- Google news
Related Articles
Batch Processing
Pipeline allows you to divide the dataset/Tasks into batches and then process it. Batch processing is mainly used to simplify many ETL operations like Missing value Imputation, expression, and validating data. You can specify the batch size called ...Generate Smart Insights with Text/Image Processing
Smart Data Insights - Dashboard Data vs External Text/Image: RubiAI allows you to generate Smart Insights wrt dashboard data and the uploaded Text/Image file. You can attach any file in the text formats- word, , csv, excel, pdf, text and image ...Optimized Dashboard Widget Loading
Overview To improve dashboard navigation and page access performance, an optimized widget loading mechanism has been introduced. With this enhancement, widget API calls are processed in controlled batches instead of triggering all widget requests ...Introduction To Pipeline Elements (Know-How)
This guide explains the key interface components of the Rubiscape Pipeline and Workbook environment—Main Menu, Nodes, Properties Pane, Task Pane, Edit Mode, and View Mode. Understanding these elements helps users design, configure, and manage ...View and Edit Mode in Workbook/Workflow
Rubiscape allows you to access the Workbook/Workflow in two modes: View and Edit. View mode is available for anyone accessing a workbook/workflow. You can switch modes by selecting the mode option in the Function pane. The "Access Log" option within ...