Creating a Dashboard
You can create a new dashboard from scratch or create a dashboard using an existing dashboard.
Creating a New Dashboard
To create a new dashboard, follow the steps given below.
- On the home page, click the Create icon.
- Hover over the Dashboard Designer tile and click the Create Dashboard button.
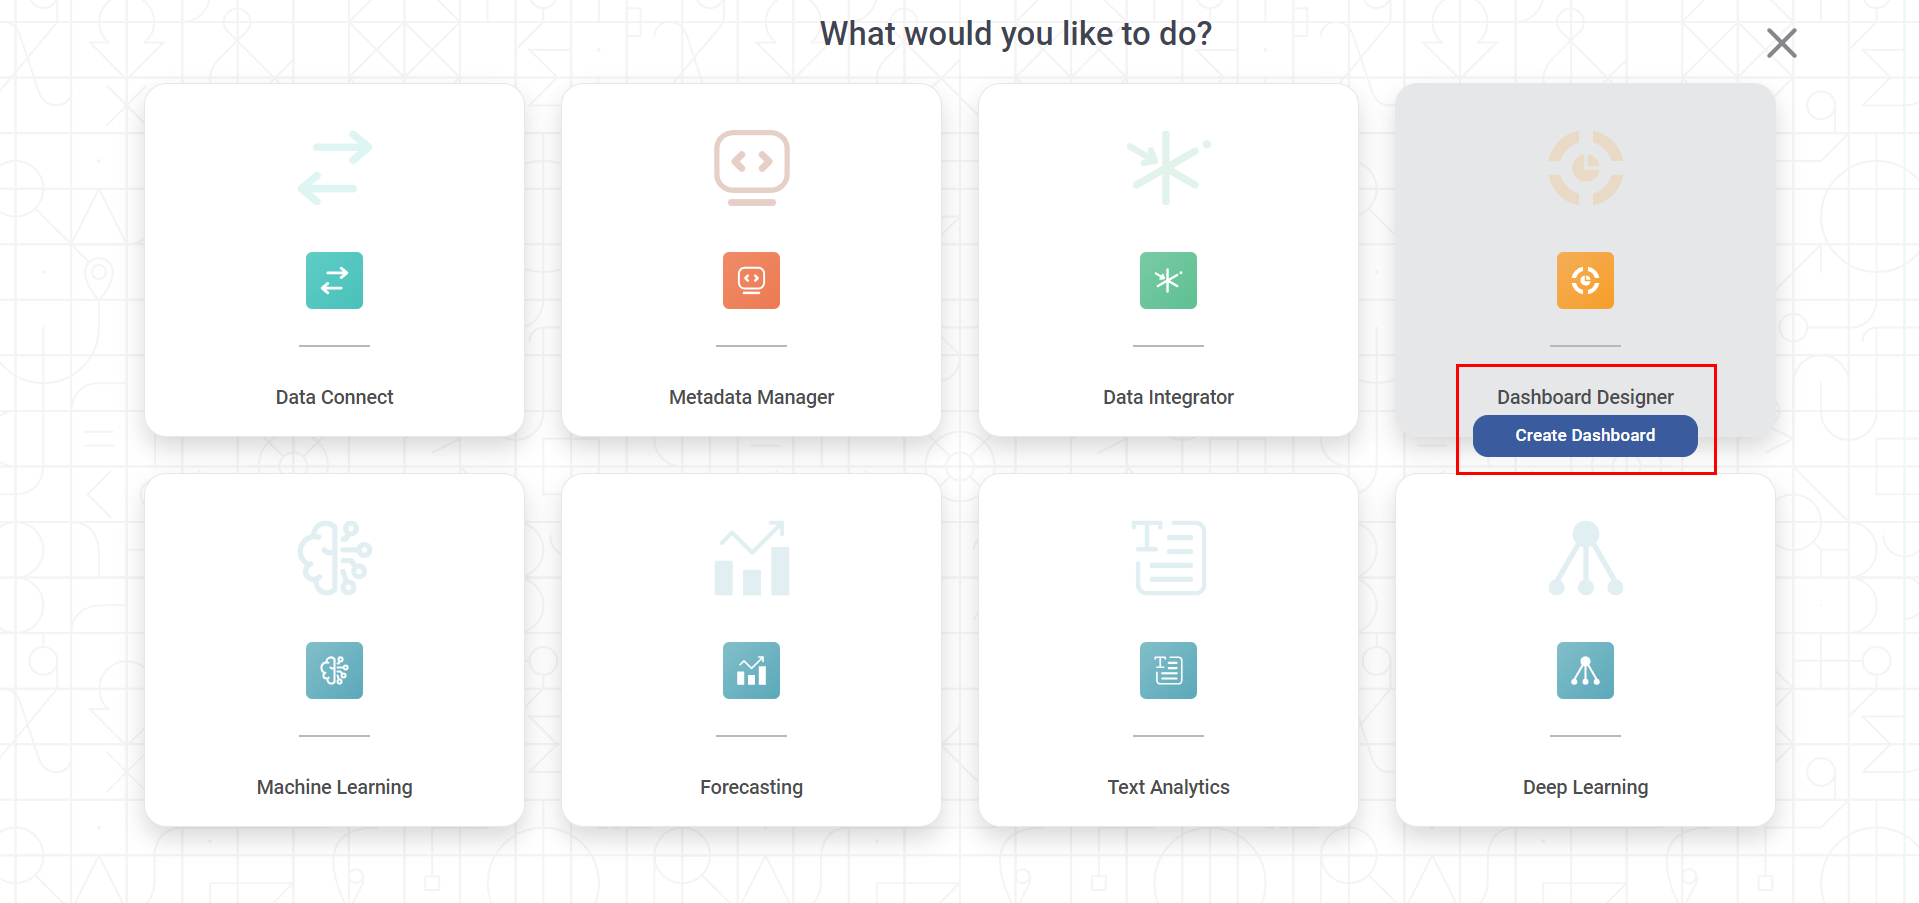
The Create Dashboard page is displayed.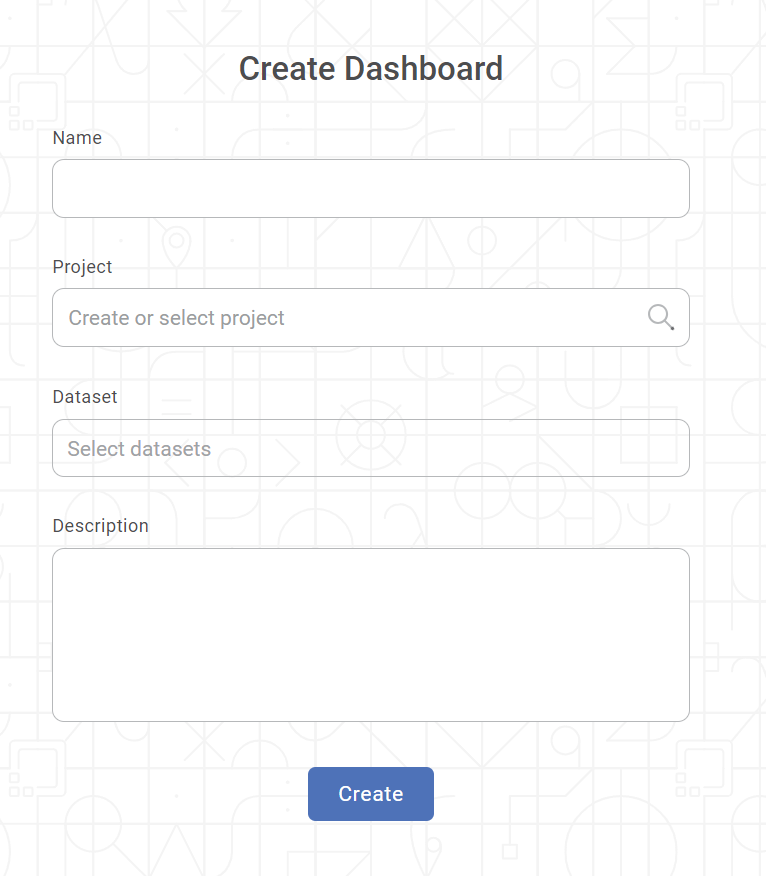
- Select the Create new radio button.
- Enter the Name for your dashboard.
Enter the name in the Project field to create a new project.
Notes:- The dashboard is created under the entered project name.
- You can also type the name of the existing project in the Project field to select the project.
- The project name is mandatory.
Click Select Dataset in the Dataset field. The Select Dataset window is displayed.
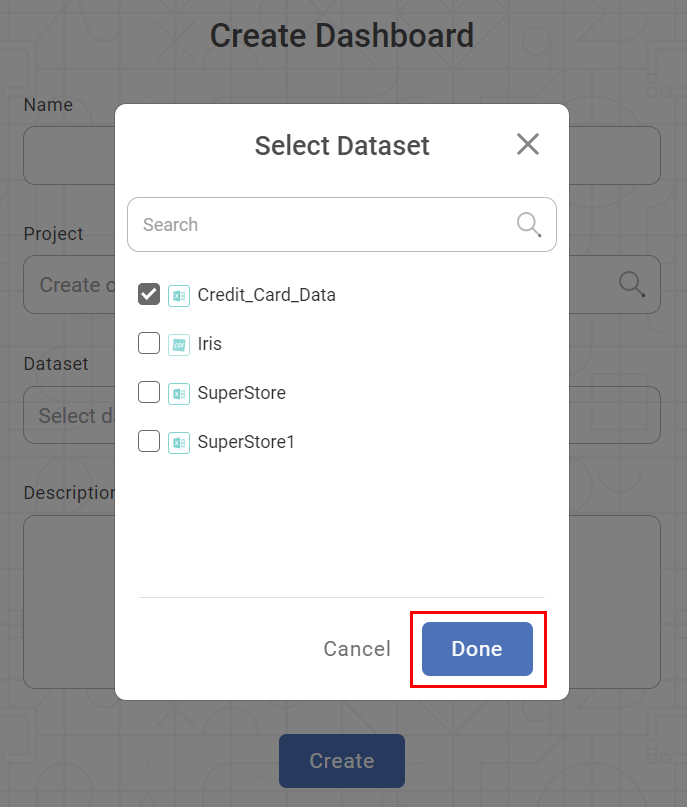
Notes:- The datasets are listed in the Ascending Order with respect to numbers and alphabets in the following sequence.
- First, the datasets with names beginning with numbers (0 to 9)
- Next, the datasets with names containing a combination of numbers (0 to 9) and alphabets (A to Z) with numbers displayed first.
- Finally, the datasets with names beginning with alphabets (A to Z)
- You can use the Search box at the top of the dataset list to search the desired dataset.
- You can select multiple datasets.
- Locate the dataset you want to add and select its corresponding check box.
- The datasets are listed in the Ascending Order with respect to numbers and alphabets in the following sequence.
- Locate the dataset you want to add and select its corresponding check box
- Click Done. The Select Dataset window is closed, and you are redirected to the Create Dashboard window.
- Enter Description for your dashboard.
- Review all fields and click Create. The dashboard is created, and the dashboard canvas is displayed.