Managing Tenants
Tenant is a non-human entity that governs users, groups, roles, workspaces, projects, and datasets. Tenant is created and governed by a Super Admin. Each tenant has at least one admin who governs its entities.
You can view all, active and inactive, in the Tenant Management space. The three clickable KPI Cards take you to the respective tabs on the Tenant Management Page.

The Tenant Management feature in Rubiscape allows to efficiently service small customers, small enterprises, and large enterprises that need access to the virtually unlimited computation resources of the Cloud.
Using the Tenant Management feature, you can
- Share software development and maintenance costs, and
- Reduce your expenditures (proving economical for customers.)
|
|

From the Tenant Management page, a super administrator can:
- Create multiple tenants
- Edit a tenant
- Deactivate a tenant temporarily
- Activate a deactivated tenant
- Delete a tenant
Understanding the Tenant Management Home Page
The image below shows the contents of various tabs.
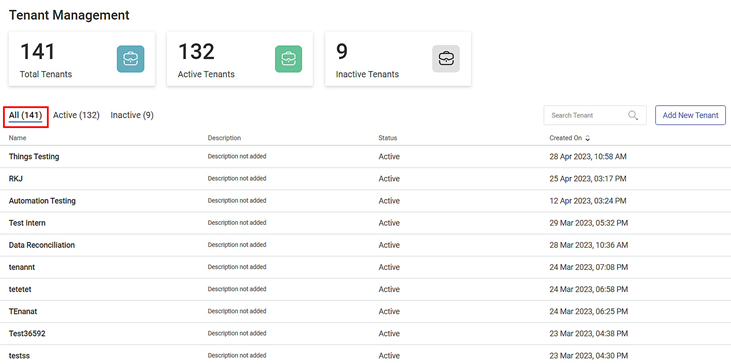
The following table explains various fields on the All tab.
Field/Icon | Description |
|---|---|
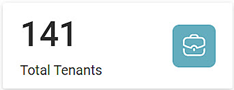 | Total Tenants KPI Card
|
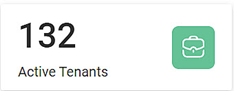 | Active Tenants KPI Card
|
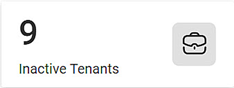 | Inactive Tenants KPI Card
|
All/Active/Inactive (Number) |
|
Search Tenant |
|
Add New Tenant |
|
 | Menu Icon
|
Adding a Tenant
To add a tenant,
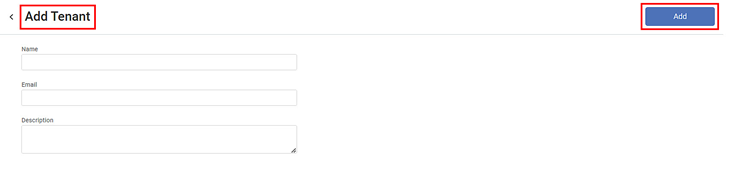
- On the Tenant Management page, click Add New Tenant. The Add Tenant page is displayed.
- Enter a Name for the tenant.
- Enter a valid and unique Email to be assigned to the tenant.
- Enter a suitable description of the tenant.
- Click Add. The newly added tenant appears in the All tenant list on the Tenant Management page.
|
|
Searching a Tenant
Searching for a tenant from a long list can be time-consuming. The Search Tenant field helps to search for your desired tenant quickly.
To search for a tenant,
- In the All tab, click inside the Search Tenants field.
- Type the name of the tenant you want to search. Partial names are allowed for searching. A list of tenant names matching the search string is populated as you start typing.
Editing a Tenant
As a super administrator, you can edit the details of an active or inactive tenant when required. This includes editing/changing the tenant's name, description, and status. However, you cannot change the email assigned to the tenant.
To edit a tenant,
- Hover over the tenant you want to edit, click on the menu icon (
 ) and click Edit. You are navigated to the Edit Tenant page.
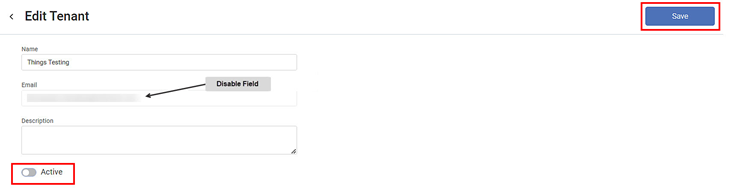
- Make changes to the user details as required. You can change the name and description of the tenant. The Email field is disabled for change.
- If you want to deactivate the tenant, turn the Active toggle button off (
 ).
). - Click Save on the top-right corner. The updated tenant appears in the All tenant list on the Tenant Management page.
Deactivating an Active Tenant
When you create a tenant, it is Active by default. You can deactivate an active tenant temporarily when it is not needed. When you deactivate a tenant, its associated Workspaces, Projects, Datasets, Roles, Groups, and Users are also suspended.
Deactivating a tenant suspends its operations temporarily. You can activate it again when needed.
To deactivate an active tenant,
- Search and locate the tenant you want to deactivate in the Active tab.
- Hover over the tenant, click on the menu icon (
 ) and click Deactivate. A confirmation message to deactivate the tenant pops up.
 - Click Deactivate on the message. The Tenant is deactivated, and a confirmation message is displayed.
- Alternately, follow step 3 of Editing a Tenant to deactivate the tenant. You notice that the count of active tenants decreases, and that of the inactive tenants increases by one (1).
Activating an Inactive Tenant
To activate an inactive tenant,
- Search and locate the tenant you want to activate in the Inactive tab.
- Hover over the tenant, click on the menu icon () and click Activate. The Tenant is activated.
- Alternately, follow step 3 of Editing a Tenant to activate the tenant. In this case, turn the Active toggle button on (
 ). You notice that the count of inactive tenants decreases, and that of the active tenants increases by one (1).
Deleting a Tenant
You can delete a tenant that's no longer required. Deleting a redundant tenant avoids the accumulation of unnecessary tenants. Deleting a tenant also deletes its associated Workspaces, Projects, Datasets, Roles, Groups, and Users.
To delete a tenant,
- In the All/Active/Inactive tab, navigate to the tenant you want to delete.
- Hover over the tenant, click on the menu icon (
 ) and click Delete. A confirmation message to delete the tenant pops up.
 - Click Delete on the message. The tenant is deleted, and a confirmation message is displayed.
Related Articles
Managing Users
You can view your Tenant's users, groups, and roles in the User space. The four clickable KPI Cards for Live User Sessions, Users, Groups, and Roles take you to the respective tabs on the User Page. You can see a User Sessions chart on each of the ...Managing Datasets
What is Reader In rubiscape, a reader is referred to as a dataset. Dataset is a collection of elements extracted from different sources that can be integrated into one. The datasets added can be shared across different Projects. They are used to ...Managing Things
Understanding Things A thing in RubiThings is any physical object, such as an intelligent sensor or edge device that can transfer data over a network, any of the IoT-enabled devices Adding a New thing You can add a thing by Clicking Things in the ...Managing Rules
Understanding Rules A rule in RubiThings is a set of instructions defined to trigger and generate an alert based on the specified condition. These rules get applied to any data packet in near real-time. Adding a Rule You can add a rule by Clicking ...Managing Groups
Understanding Groups A group in RubiThings is to organize your things dynamically into logical groups by tagging them. Adding a Group You can add a group by Clicking Groups in the Manage dropdown (for the first time) Clicking Create Group on the ...