Adding Calculated Column to Dashboard
To add a calculated column to your dashboard, follow the steps given below.
- Open the Dashboard in edit mode. Refer to Editing a Dashboard.
The dashboard is displayed. - Add a dataset to the dashboard. Refer to Adding Dataset in RubiSight.
- In the DATA pane, click the ellipsis corresponding to the dataset, and then click Add calculated column.
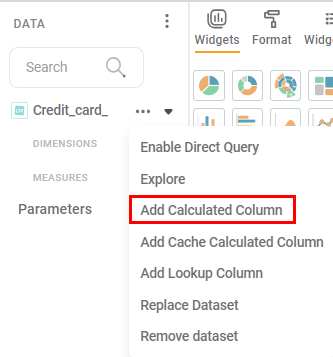
The Add Calculated Column page is displayed.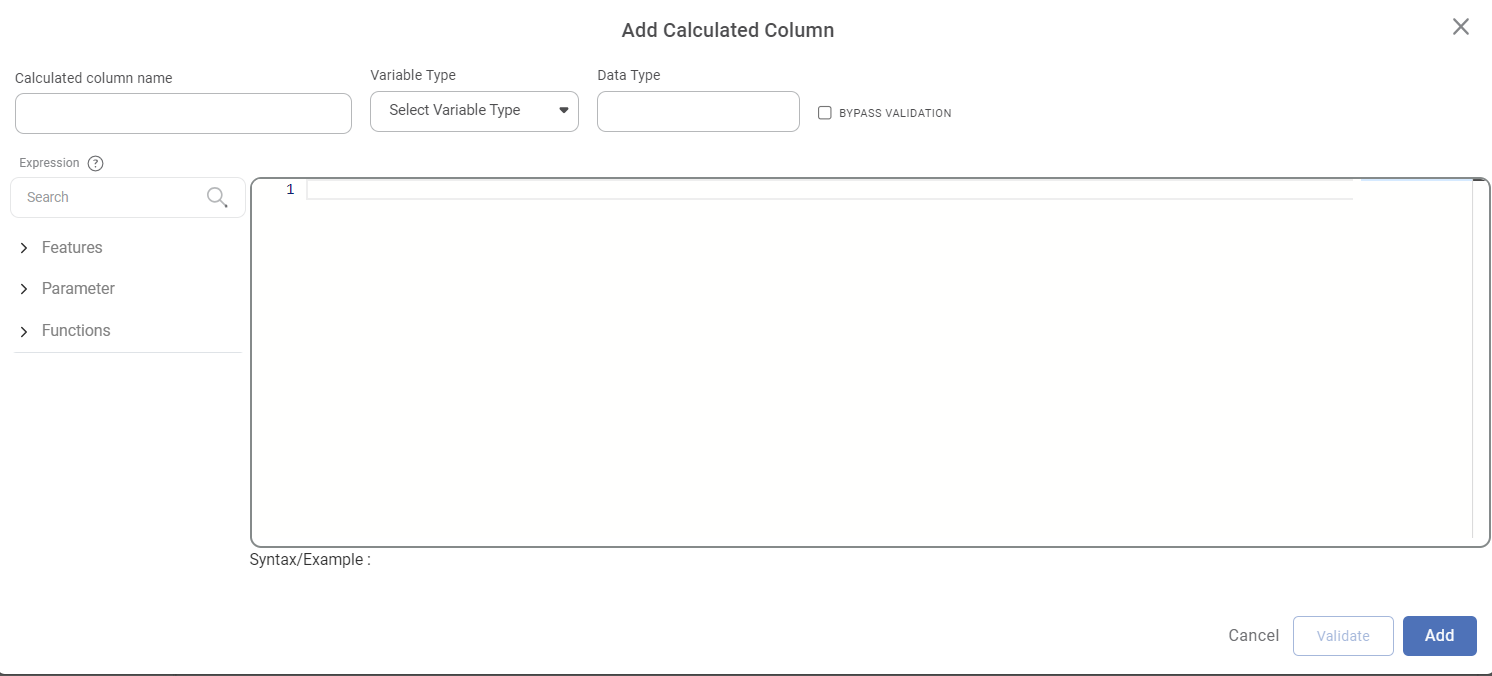
The table given below describes the different fields present on the Add Calculated Column page.
Field | Description | Remark |
Calculated Column Name | It allows you to enter the name of the newly created calculated column. | — |
Variable Type | It allows you to select the variable type of the feature. If it is not selected, the system defines the variable type on the click of Validate. | The available options are,
|
Data type | It displays the data type of the feature based on the selected variable type. The system defines it as per the output type of the expression. | — |
| Hyperlink to access the online help for Expression. | — |
| It deletes the built expressions and closes the Add column Page. It removes the unsaved changes. | — |
| It validates the expression based on the selected features, operators, and the variable type of the newly created column. It also returns the data type of output of the given expression. | — |
| It adds the newly created column to the dataset features. | — |


On the Add Calculated Column page,
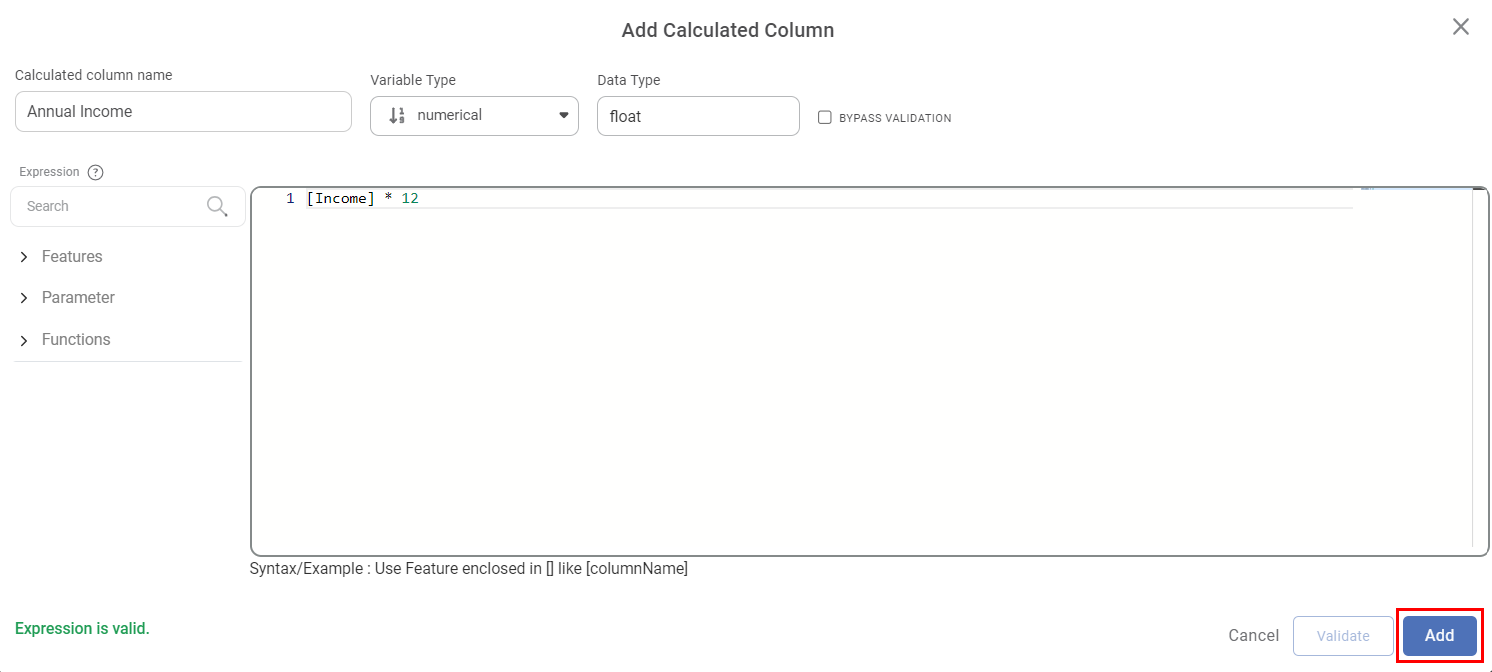
- Enter the Calculated column name.
- Select the Variable Type from the drop-down. This step is optional. If you do not select the variable type, the system defines it on the click of Validate.
- Build your expression for a new column to be added. Refer Expression.
- Once the expression is ready, validate the expression. Click Validate.
If the expression is valid, Expression is valid message is displayed. - To add the new calculated column, click Add.
The newly calculated column is added to the dashboard and is displayed in the list with a © symbol. It can be used to plot widgets.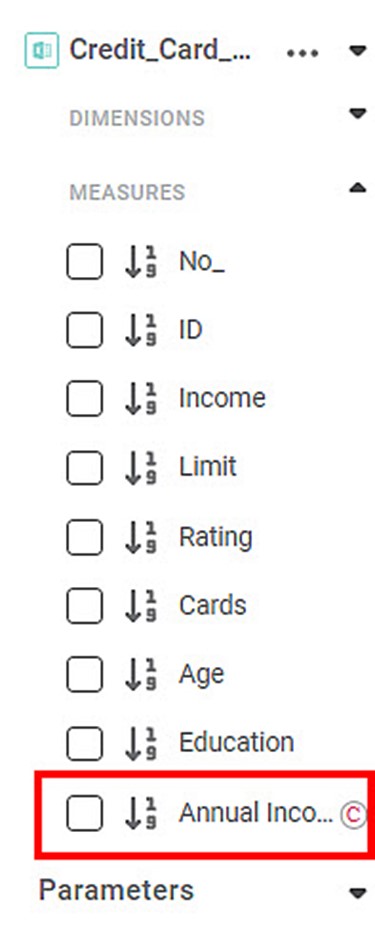
Related Articles
Adding Calculated Column to Dataset
The created Parameter can be used in the Dashboard on any page. To use the Parameter, we first create a Calculated Column based on the Parameter. To create a Calculated Column, follow the steps given below. Open the Dashboard in edit mode. Refer to ...Editing Calculated Column
You can edit the calculated column. To edit a calculated column, follow the steps given below. Open the Dashboard in edit mode. Refer to Editing a Dashboard. The dashboard is displayed. In the DATA pane, locate the required dataset and then click the ...Add Cache Calculated Column
Rubiscape allows you to create a Cache Calculated Column in the dashboard. It has similar functionality as the Calculated Column. While creating a Cache Calculated Column, a cache file is generated. After every update in the source file or calculated ...Add Lookup Column in Dashboard
The Lookup feature helps you to match the values between two or more data sources. It is used to determine the presence of a particular field from one data source to another. The Lookup functionality in Rubiscape allows you to connect two data ...Saving a Dashboard
You can save a dashboard to access and view it later. There are two modes in which you can save a dashboard. These are, Save (to save a dashboard with its current credentials) - To save a dashboard, open the dashboard in Edit Mode and click the save ...