Applying Filter to a Feature
To filter a feature in a dataset, follow the steps given below:
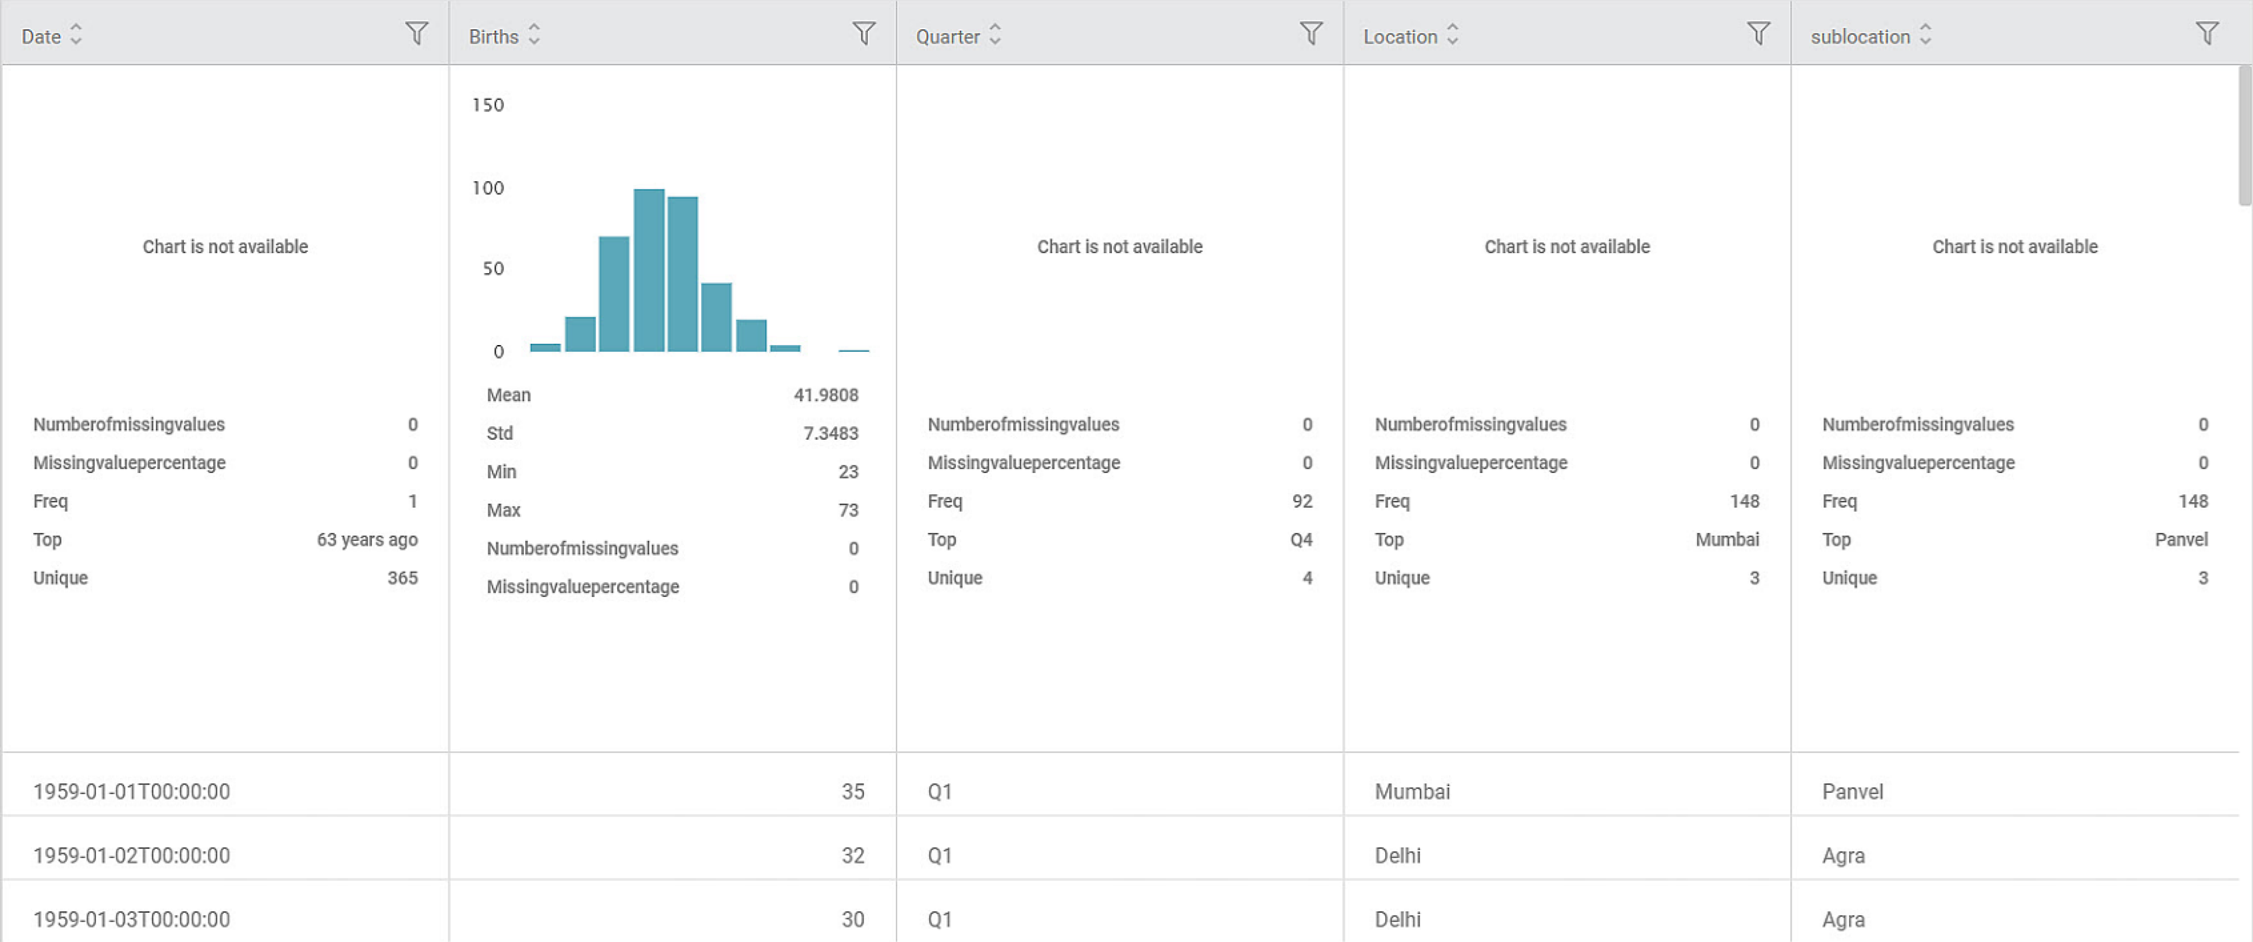
- Perform steps 1 to 4 of Exploring a Dataset. The explored dataset is displayed on the Data page.
- Click the filter icon (
 ) next to the Feature that you want to filter.
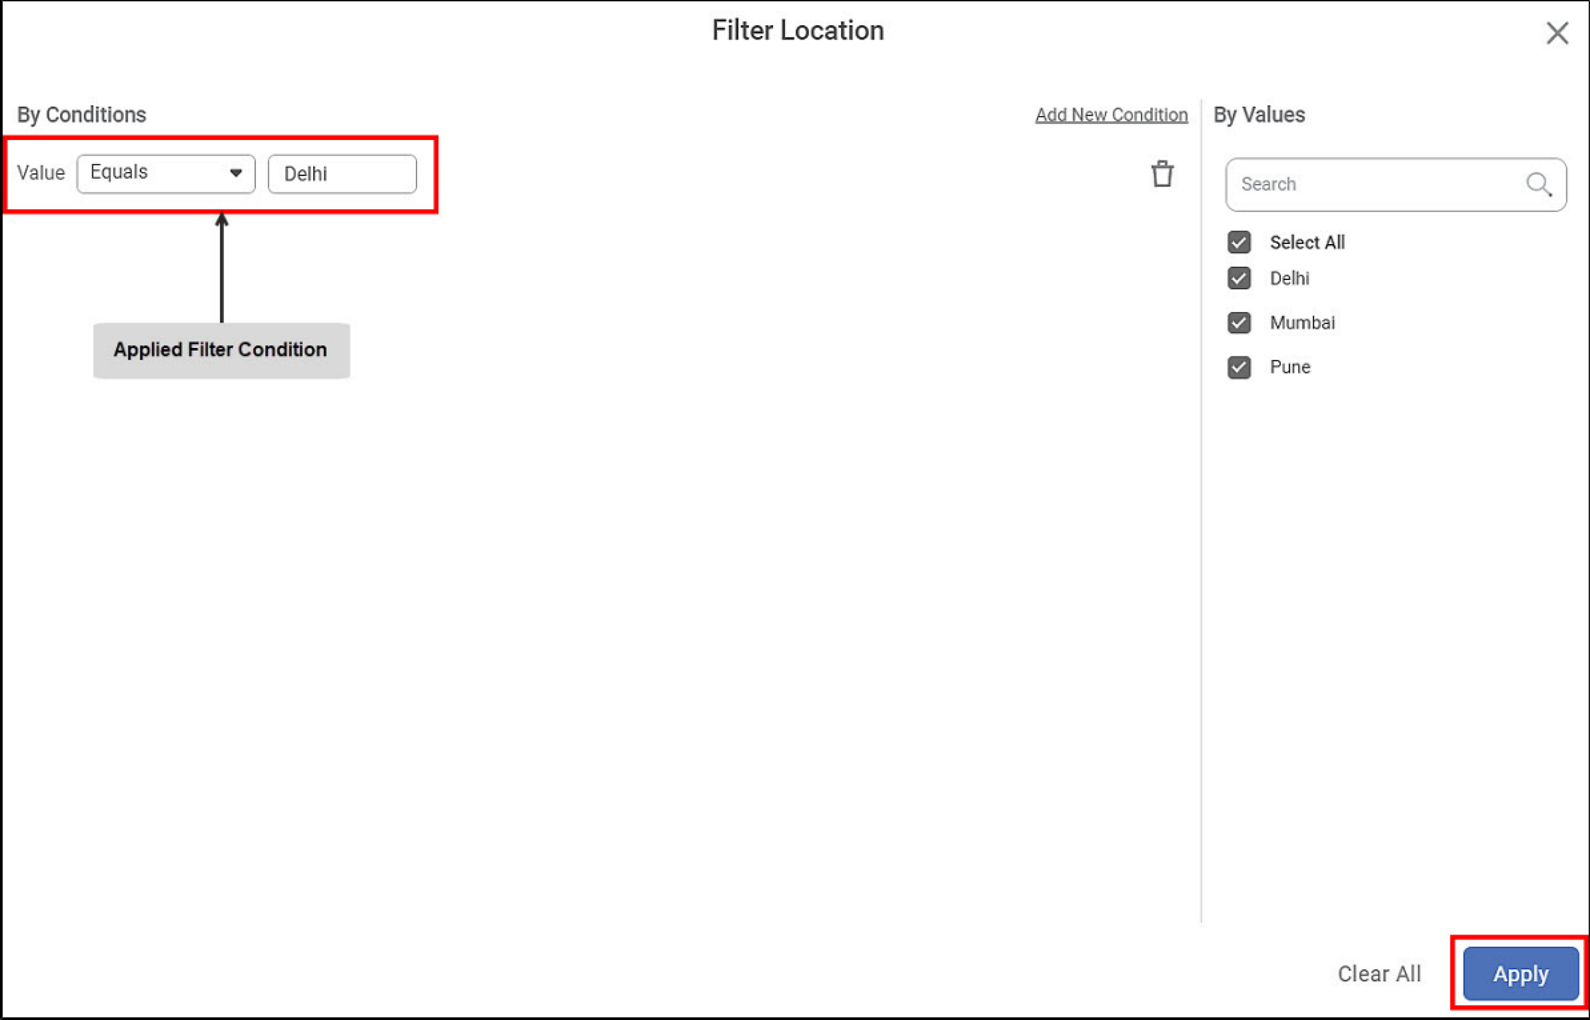
A filtering dialog box is displayed. For example, we apply the filter to Location. - Click Add Condition to view the filtering conditions.
Depending on the variable type: Numerical, Categorical, Textual, or Date (Interval), the filtering conditions are displayed.
Refer to the table Dataset Filter Options. - From the listed options, select the required condition.
For example, we select the condition Equals. - Enter the required numerical value, text, or interval value.
For example, we insert the text Delhi.Click Apply.
The filtered dataset is displayed. The rows displayed for all the features in the dataset depend on the filtered data.
In the above example, the resultant Data page displays rows with Location.
Also, the color of the filter icon changes to black which indicates that a filter is applied. A similar symbol appears in the top right corner of the data page indicating that the dataset is filtered.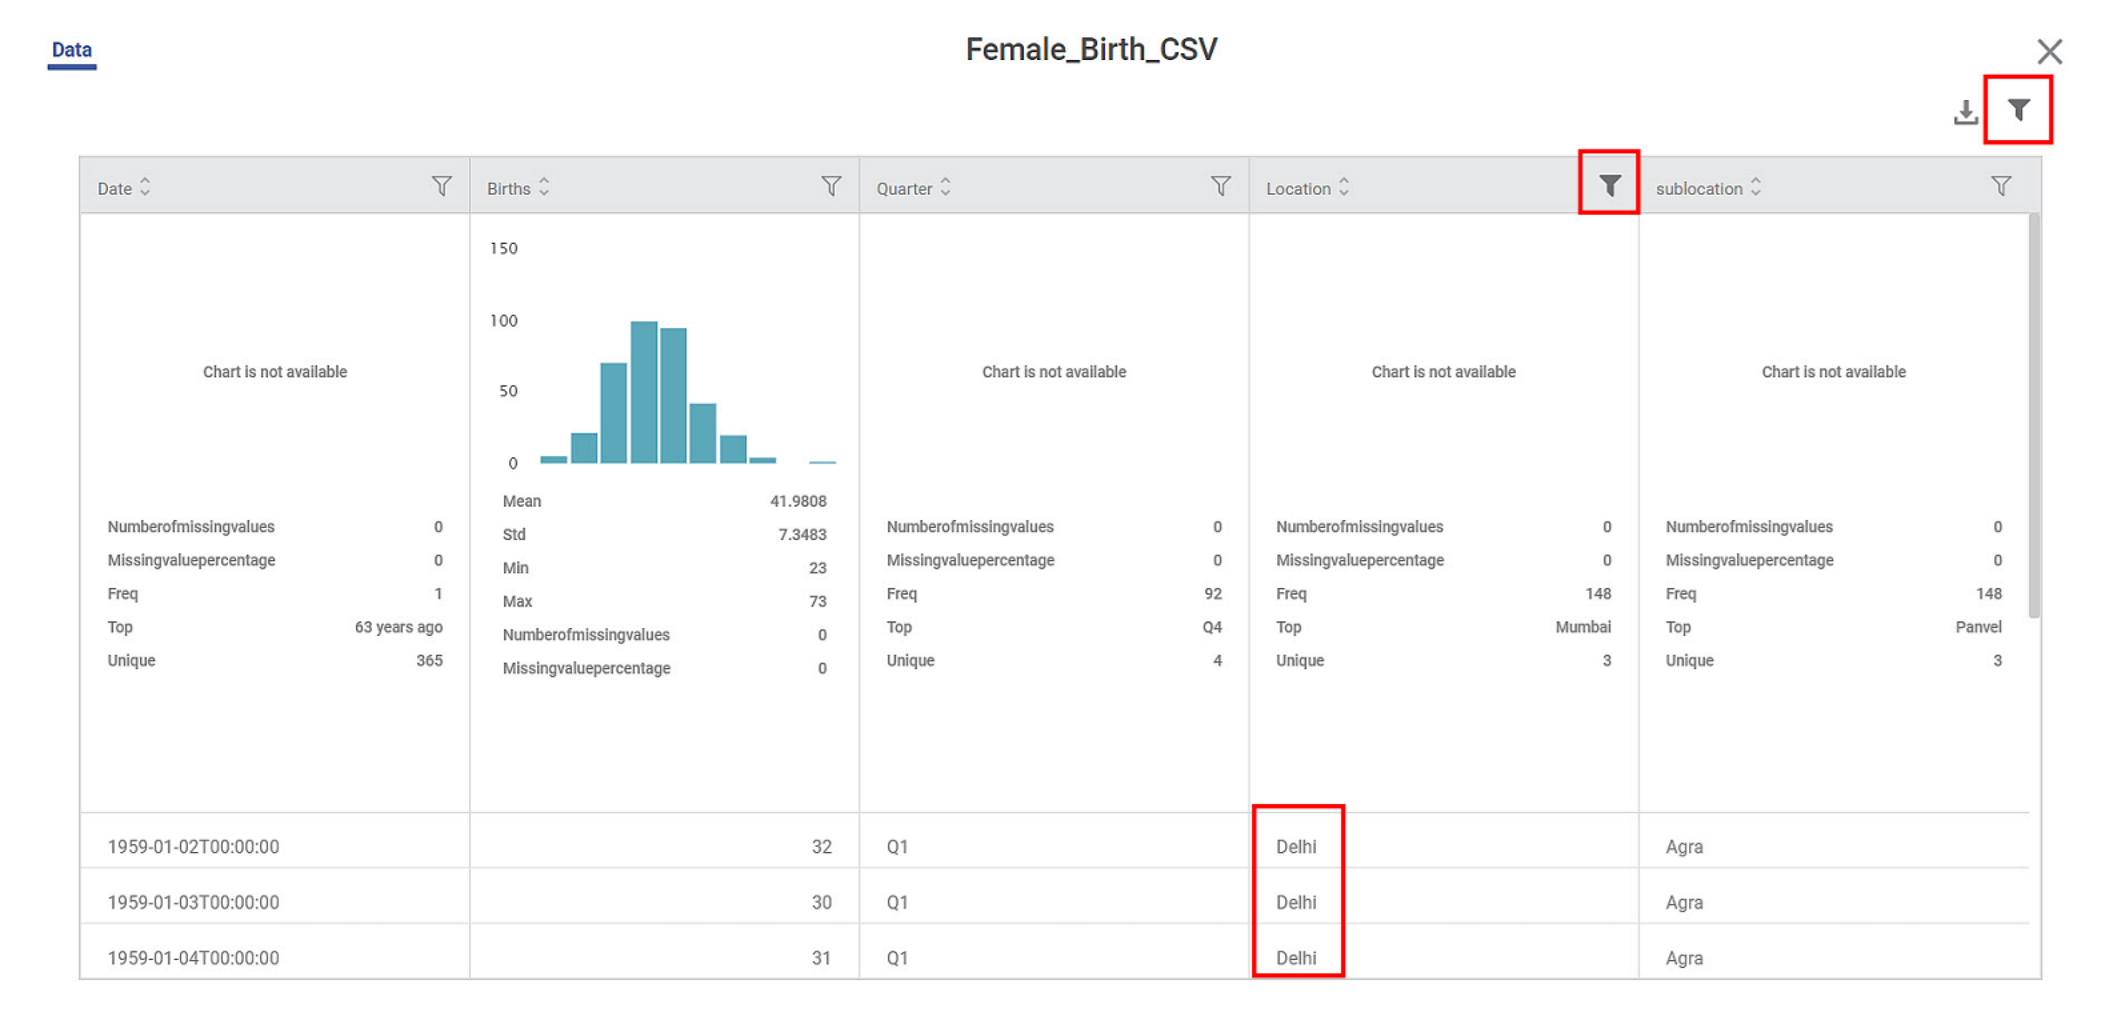

Notes:
- You can apply multiple filter conditions to the same column.
- In this case, all conditions are applied. The conditions that are applicable across the entire column are applied top to bottom data. The remaining conditions are applied one by one to the filtered data points.
- The ultimate dataset contains filtered data points that satisfy all the applied conditions.
- For example, we apply two conditions to the same column containing categorical variables.
- Condition 1:
- Contains ‘a’
- Effect: Column is displayed with all data points containing the alphabet ‘a’
- Condition 2:
- Equals ‘animals’
- Effect: After applying both the conditions to the same column, all ‘animal’ data points are displayed.
Similarly, you can further apply other filters on the already filtered dataset and sort data according to your requirements.
For example, let’s apply the Filter to the Date values, as shown below.
The resultant dataset is as shown below. The Data page displays all rows containing the Date selected in the filtering condition.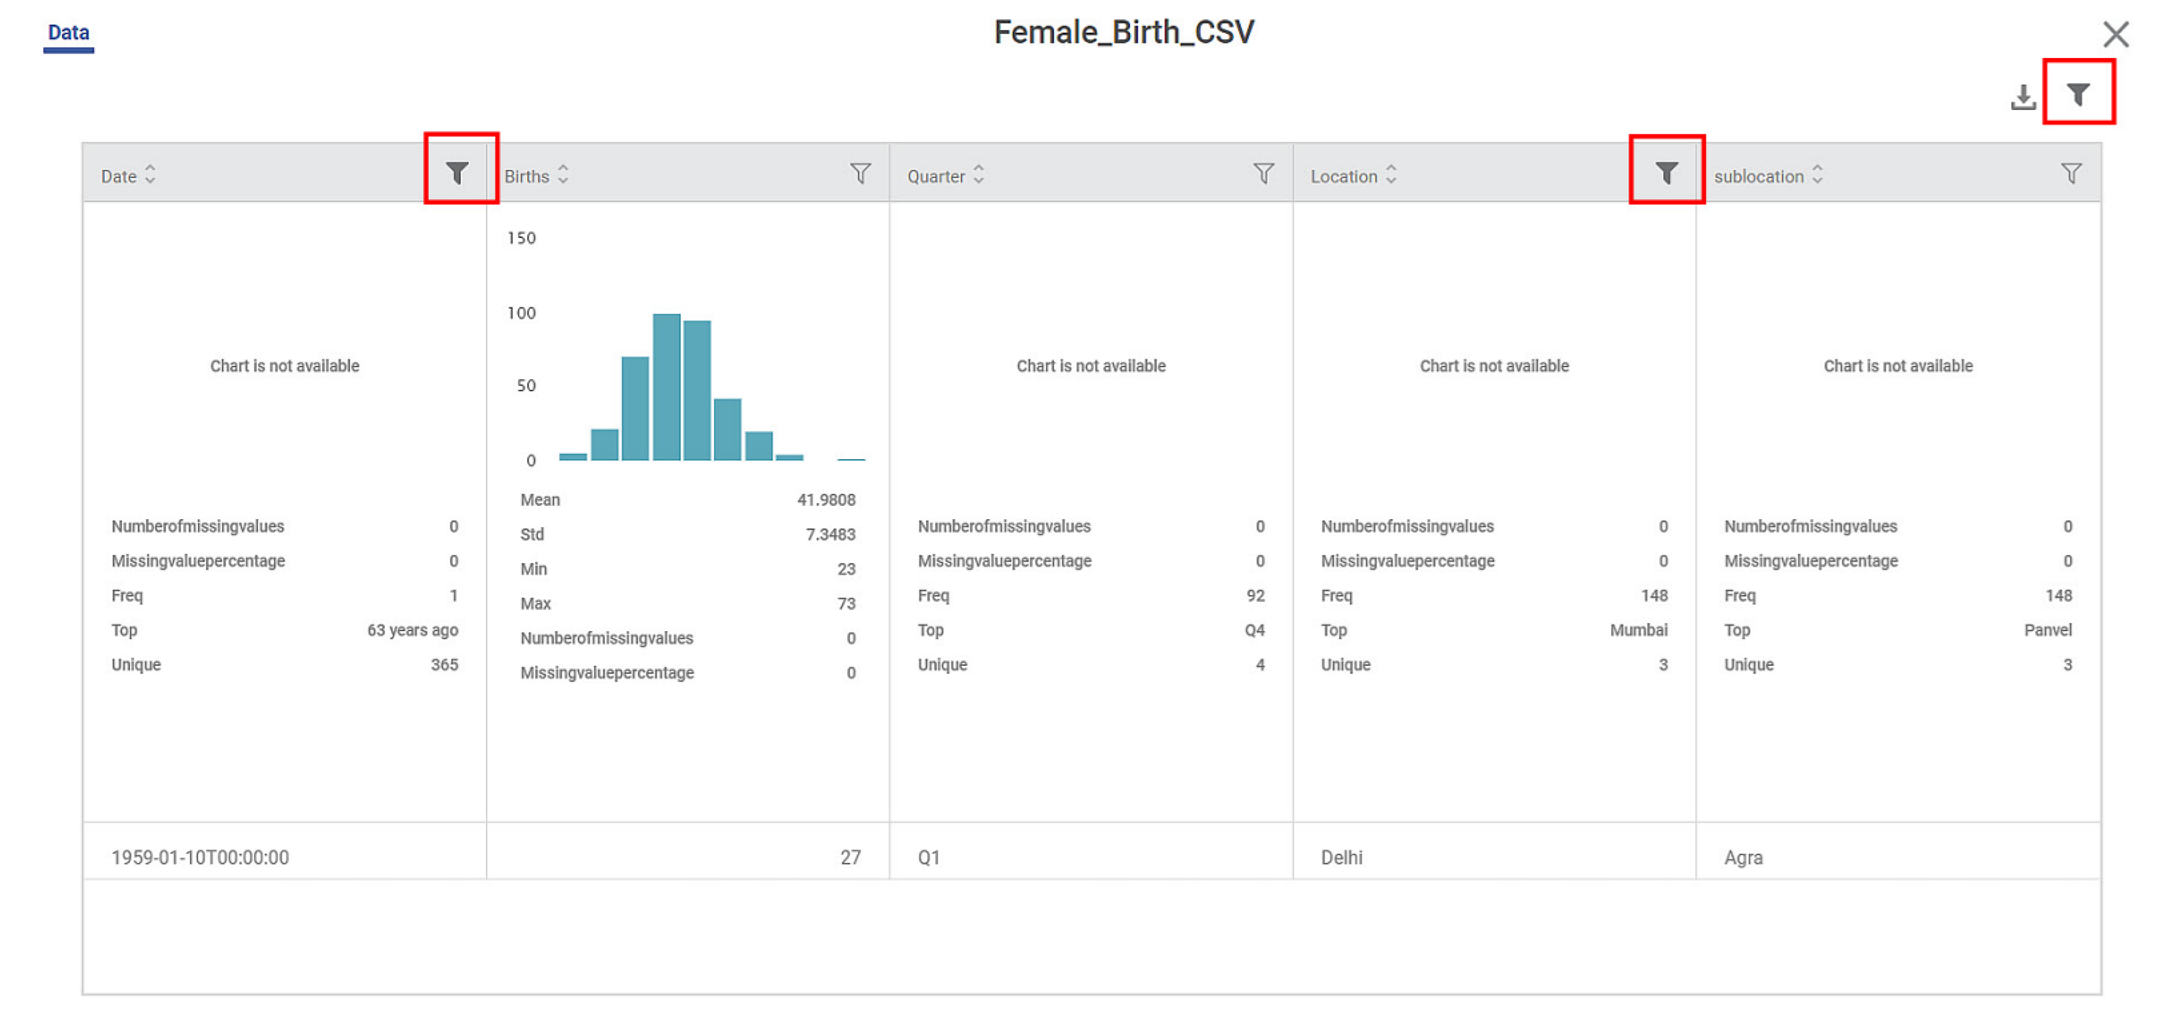
Notes:
- For the Time variable, the filter format options are displayed according to the date/time format followed by your system.
- Two Time formats are available: 12hr format and 24hr format
- Make sure you apply the date format filter from these available options.
Related Articles
Page Filter
The Page Filter option is always available on the filter pane of the Dashboard canvas. The page filters apply to all the charts plotted on a page of the Dashboard. To apply a Page Filter, follow the steps given below. Create the number of charts as ...Filter Column
Filter Column in rubiscape allows to choose between the columns in the table you want to keep and remove. Also, it allows you to rename the columns and pass them to the successor node. Filter Column is located under Model Studio >> Data Preparation ...Removing the Applied Filter
You can delete or clear the applied filter if it is no longer required. To remove the filter, use any of the following methods: Delete the applied condition. For this, navigate to the filtering dialog box, click the Delete icon, and then click Apply. ...Search Option In Filter Widget
In RubiSight, a Filter Widget filters data present in other widgets on the same dashboard page. Usually, a categorical feature is used to plot a filter widget. When you plot a filter widget, the values appear on the filter widget in the form of List ...Drill Through from Chart to Page with Context Filtering
Drill Through Filters (Page Level) Overview Drill Through Filter option is available at the page level in the Filter Pane and is accessible from Edit/View/Outer modes. It enables navigation from one widget to another page while passing contextual ...