Building Recursive Workflow
Rubiscape provides a feature that enables the execution of a complete workflow inside another workflow. This helps to execute multiple workflows with a single click.
To build a recursive workflow, follow the steps given below.
- Open the Workspace where you want to create your workflow. Refer to Changing Workspace.
- Create a Workflow. Refer to Creating a Workflow.
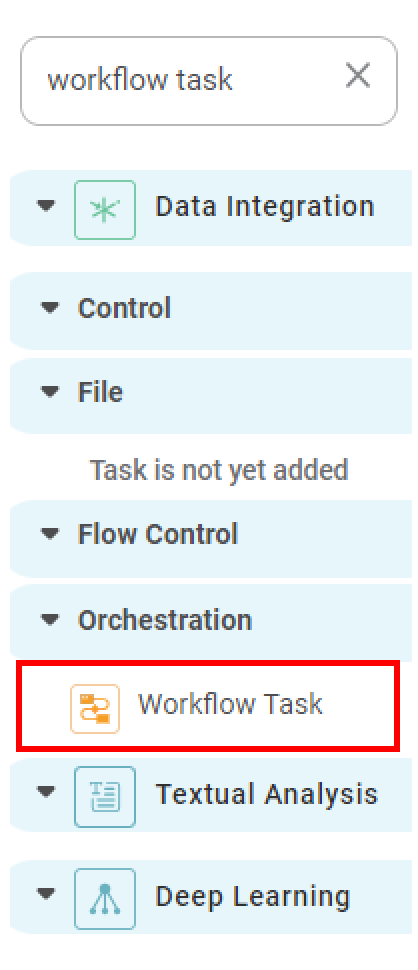
Drag and drop Workflow Task on the canvas.

Notes:
- Workflow task does not require any predecessor or successor. It can be used without connecting to a reader or any other algorithms.
- You can connect reader nodes and other algorithm nodes to Workflow Task, if required. However, this is optional.
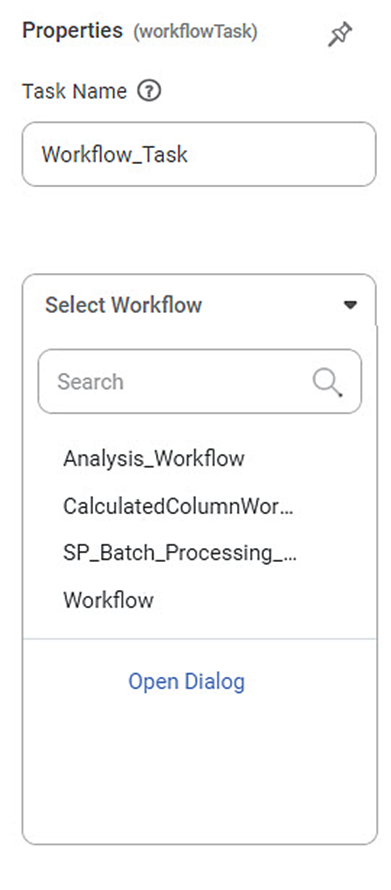
- Select Workflow Task.
Properties are displayed in the right pane. - From the Select Workflow drop-down, select the name of the workflow you want to execute in recursion.
- Save the workflow.
- Run the workflow. First, the workflow selected in step 6 is executed, and then the tasks in the current workflow are executed. After successful completion of all workflow execution, a confirmation message is displayed.
Notes: |
|
Related Articles
Building Algorithm Flow in a Workflow Canvas
Building algorithm flow in a Workflow Canvas is similar to building algorithm flow in a Workbook Canvas. You can use your trained algorithms here. To build algorithm flow in a Workflow Canvas, refer to Building Algorithm Flow in a Workbook Canvas. ...Workflow as a Task
Overview A new Workflow Task functionality has been introduced under Workbench >> Orchestration to allow execution of one workflow inside another workflow. The behavior and execution flow are similar to the existing Pipeline Task functionality ...Editing a Workflow
To edit the workflow, follow the steps given below. On the home page, click Workflows. Recent Workflows for the selected workspace are displayed. Hover over the workflow you want to edit and click View. The workflow canvas is displayed. Edit the ...Workflow : Workbench : Approve
1. Introduction The Approve node in the Workflow module is designed to support approval-driven governance flows. It pauses workflow execution until the assigned approver reviews the selected dashboard and chooses Approve, Reject, or Investigate. The ...Workflow : Delegate, Recall, Reassign, Workflow Task Cards.
Introduction The Workflow Module in Rubiscape enables users to create workflows, design process flows using nodes, configure approval steps, assign approvers, and monitor task statuses within the same workspace. 1. Tasks Tab The Tasks tab displays ...