Congifuring Feature Types
While creating a dataset of File type, you can change the variable type of the features displayed in the Features box.
After selecting a file, the features in it are displayed in the Features box. To configure the variable type of a feature, follow the steps given below.
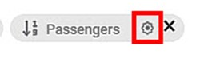
- Hover over the feature that you want to configure.
A Gear icon ( ) and a Close icon (
 ) are displayed.
 - To configure the feature, click the Gear icon ().
Type Configurations dialog box is displayed. - From the Variable Type drop-down, select the variable type you want to assign to the selected feature.
The available variable types and associated data types are given in the table below.Variable Type
Data Type
Remark
Numerical
Integer, Float
—
Textual
Text
—
Interval
Date
- For Interval type, you can select from the currently supported formats or configure a customized format.
- For the currently supported date/time format(s), refer to Table 6: Date and Time Formats Supported by Rubiscape.
- To configure customized date and time formats, refer to Table 7: Customized Formats for Date and Time in Interval Type Features.
Categorical
Text
—
Geographical
Text
- It is available only if the variable type is Categorical.
- You can configure any categorical or textual column as Geographical.
- For steps to create a dataset containing a geographical column, refer to //Cross reference to Creating a Dataset with Geographical Variable Type.
- The supported date and time formats are displayed in the table below.
Date Formats
13-12-1947
13.December.47
1947/13/12
47/13/12
12-13-1947
13/12/1947
1947/13/Dec
47/13/Dec
12-13-1947
13/12/47
1947/13/December
47/13/December
12.13.1947
13/December/1947
1947/Dec/13
47/Dec/13
12.13.47
13/December/47
1947/December/13
47/December/13
12/13/1947
1947-12-13
47-12-13
Dec-13-1947
12/13/47
1947-13-12
47-13-12
Dec-13-47
13-12-47
1947-13-Dec
47-13-Dec
Dec.13.1947
13-12-1947
1947-13-December
47-13-December
Dec.13.47
13-Dec-1947
1947-Dec-13
47-Dec-13
Dec/13/1947
13-Dec-47
1947-December-13
47-December-13
Dec/13/47
13-December-1947
1947.12.13
47.12.13
December-13-1947
13-December-47
1947.13.12
47.13.12
December-13-47
13.12.1947
1947.13.Dec
47.13.Dec
December.13.1947
13.12.47
1947.13.December
47.13.December
December.13.47
13.Dec.1947
1947.Dec.13
47.Dec.13
December/13/1947
13.Dec.47
1947.December.13
47.December.13
December/13/47
13.December.1947
1947/12/13
47/12/13
Time Formats
13:30:55
01:30:55 PM
1:30:55 PM
13:30
1:30 PM
01:30 PM
Notes:
- A separator is used when the value contains date as well as time. For example, 1947-12-13T13:30:55
- Supported separators are Space ( ), Hyphen (-), Comma (,), Semicolon (;), Colon (:), Dot (.), T, and U.
The different customized formats supported for date and time are given in the table below.
Directive
Explanation
Example
%a
Abbreviated weekday name
Sun, Mon, ..., Sat
%A
Full weekday name
Sunday, Monday, ..., Saturday
%w
Weekday as a decimal number
0, 1, ..., 6
%d
Day of the month as a zero-padded decimal
01, 02, ..., 31
%-d
Day of the month as a decimal number
1, 2, ..., 30
%b
Abbreviated month name
Jan, Feb, ..., Dec
%B
Full month name
January, February, ..., December
%m
Month as a zero-padded decimal number
01, 02, ..., 12
%-m
Month as a decimal number
1, 2, ..., 12
%y
Year without century as a zero-padded decimal number
00, 01, ..., 99
%-y
Year without century as a decimal number.
0, 1, ..., 99
%Y
Year with century as a decimal number.
2013, 2019, 2021, ...
%H
Hour (24-hour clock) as a zero-padded decimal number
00, 01, ..., 23
%-H
Hour (24-hour clock) as a decimal number
0, 1, ..., 23
%I
Hour (12-hour clock) as a zero-padded decimal number
01, 02, ..., 12
%-I
Hour (12-hour clock) as a decimal number
1, 2, ... 12
%p
Locale’s AM or PM.
AM, PM
%M
Minute as a zero-padded decimal number
00, 01, ..., 59
%-M
Minute as a decimal number
0, 1, ..., 59
%S
Second as a zero-padded decimal number
00, 01, ..., 59
%-S
Second as a decimal number
0, 1, ..., 59
%f
Microsecond as a decimal number, zero-padded on the left
000000 to 999999
%z
UTC offset in the form +HHMM or -HHMM
+0530, -0530, ...
%Z
Time zone name (abbreviation)
CST, IST, ...
%j
Day of the year as a zero-padded decimal number
001, 002, ..., 366
%-j
Day of the year as a decimal number
1, 2, ..., 366
%U
Week number of the year (Sunday as the first day of the week). All days in a new year preceding the first Sunday are considered to be in week 0.
00, 01, ..., 53
%W
Week number of the year (Monday as the first day of the week). All days in a new year preceding the first Monday are considered to be in week 0.
00, 01, ..., 53
%c
Locale’s appropriate date and time representation
Mon Sep 30 07:06:05 2013
%x
Locale’s appropriate date representation
09/30/13
%X
Locale’s appropriate time representation
7:06:05
- Select the required variable type and other relevant information. For configuring the Interval type variable, refer to Configuring Interval Type Feature.
- Click Done.

The variable type of the selected feature is updated.
Configuring Interval Type Feature
To configure the date and time format of the Interval type feature, follow the steps given below.
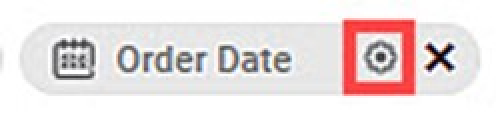
Hover over the Interval type feature for which you want to configure the date and time format.
A Gear icon () and a Close icon () are displayed.Note:
The Interval type feature is represented by the interval icon (
 ) before the feature name.
- To configure the feature, click the Gear icon ().
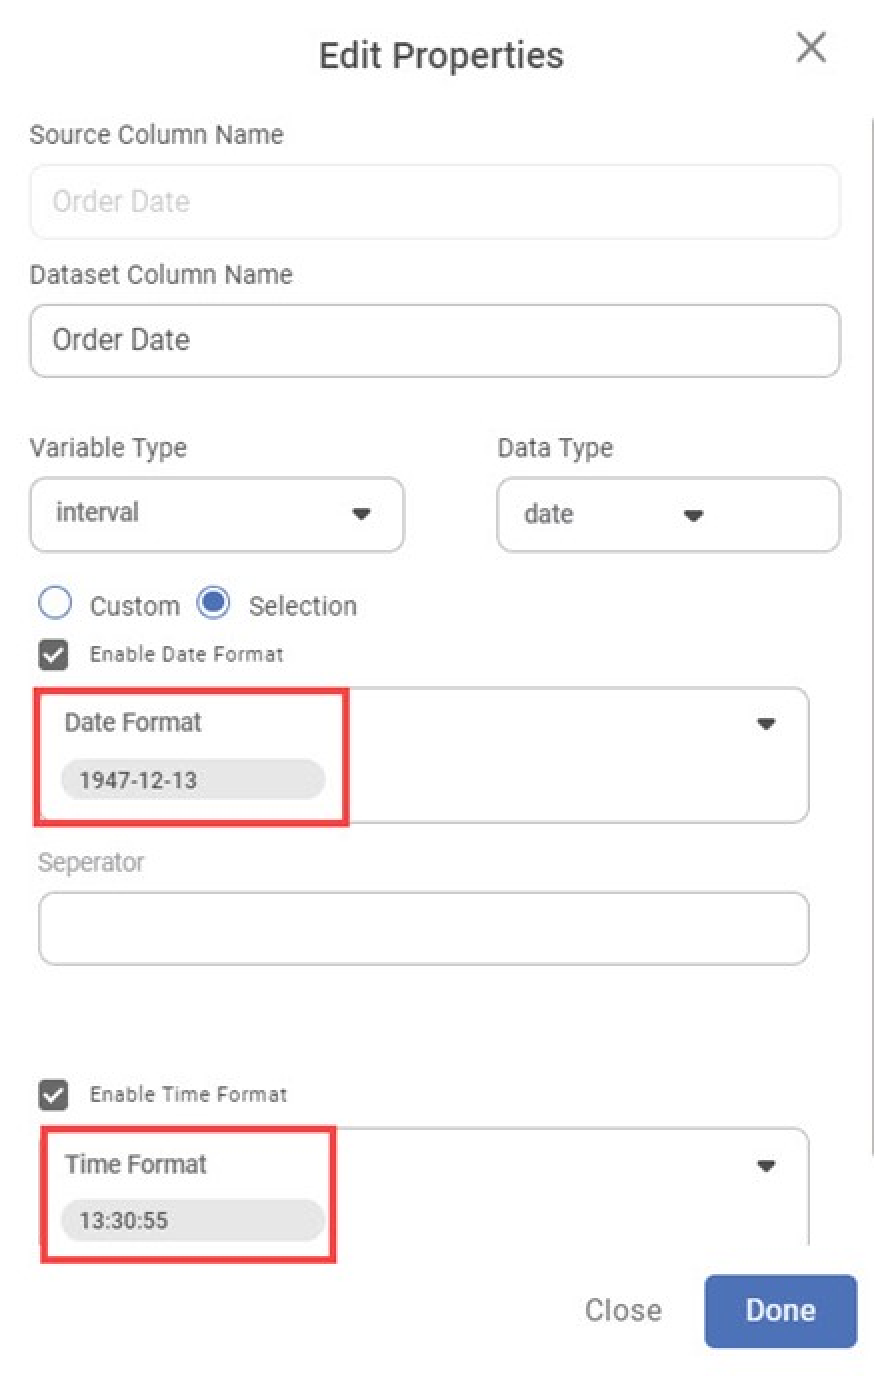
Type Configurations dialog box is displayed.
Enter the required values in the fields, and then click Done.
Notes:
- There are two radio buttons on the Type Configurations window. These are Custom and Selection.
- The Selection radio button is selected by default.
When you create a dataset containing the date feature, the date and time formats are automatically detected. You do not have to select them manually. On clicking the Gear Icon ((
- The Date Format selected from the drop-down should correspond to the date format used in the feature in the input file.
- The Time Format selected from the drop-down should correspond to the time format used in the feature in the input file.
- When input data contains DateTime format, you should select all three fields: Date Format, Separator, and Time Format. Alternatively, you should configure the corresponding customized format.
- You should select the Custom radio button to configure the customized date and time format of the Interval type feature. Refer to Configuring Customized Date and Time Format.
- If a “ ” (space) separator needs to be entered, the Separator field is kept empty since “ ” (space) is the default value.
- If any other separator needs to be entered, it should be the same as that in the feature in the input file.
The Date Format and Time Format for the Interval type feature are configured.
The feature column in the explored dataset displays the values in ISO standard date and time format supported in Rubiscape (YYYY-MM-DDTHH:MM:SS).
Notes: |
|
The different fields present on the Type Configurations dialog box of the Interval type feature are given below.
Field | Description | Remark |
Variable Type | It allows you to select the variable type that you want to assign to the selected feature. | By default, it displays the variable type of the selected feature. The available options are,
|
Data Type | It displays the data type of the selected feature, based on the variable type of the feature. | Refer to Table: Variable Types in Features. |
Custom | This radio button, when selected, allows you to enter the customized date and time formats used in the feature. | |
Enable Date Format | The checkbox is selected to display the Date Format field. |
|
Date Format | It allows you to select the date format used in the feature. |
|
Separator | It allows you to enter a separator to split the Date Format and Time Format. It also allows you to enter the separator T if your feature uses the ISO standard date and time format (YYYY-MM-DDTHH:MM:SS). |
|
Enable Time Format | The checkbox is selected to display the Time Format field. |
|
Time Format | It allows you to select the time format used in the feature. |
|
Format String | It displays the date/time format or date and time format and separator using directives and interval designator for customized configuration. |
|
Button | Description | Remark |
| It saves the values entered for the selected feature and returns to the Update Dataset page. | – |

Note: | If both Enable Date Format and Enable Time Format checkboxes are selected by default, then the values in the detected feature are in DateTime format. |
Configuring Customized Date and Time Format
You can configure the date and time format of the Interval type feature based on the user-defined format used in input data.
Thus, you can configure a customized date and time format if you use one of the formats given below in your input data.
- Date component values separated by an interval designator other than “.” (dot), “-“ (hyphen), and “/” (solidus).
- Time component values separated by an interval designator other than “:” (colon), “.” (dot), “-“ (hyphen), and “/” (solidus).
- Date and time components each separated by an interval designator other “.” (dot), “-“ (hyphen), and “/” (solidus).
Consider a feature in which you have used “:” (colon) as the interval designator between its date values. For example, 2020:12:31/13:34:59
To configure the customized date and time format of the Interval type feature, follow the steps given below.
Hover over the Interval type feature for which you want to configure the customized date and time format.
A Gear icon () and a Close icon () are displayed.Note:
The Interval type feature is represented by the interval icon (
) before the feature name.- To configure the feature, click the Gear icon ().
Type Configurations dialog box is displayed. - Click the Variable Type drop-down and select Interval if a different variable type is detected for the feature.
- Select Custom.
- Enter the Format String corresponding to the format used in the feature. Refer to Table: Customized Formats for Date and Time in Interval Type Features.
Click Done.
Notes:
- Here, the interval designator used between date values in the feature is “:” (colon).
- Here, a “/” (solidus) separator is used in the feature to split the Date Format and Time Format.
- The Custom selection supports all special characters as interval designators and separators.
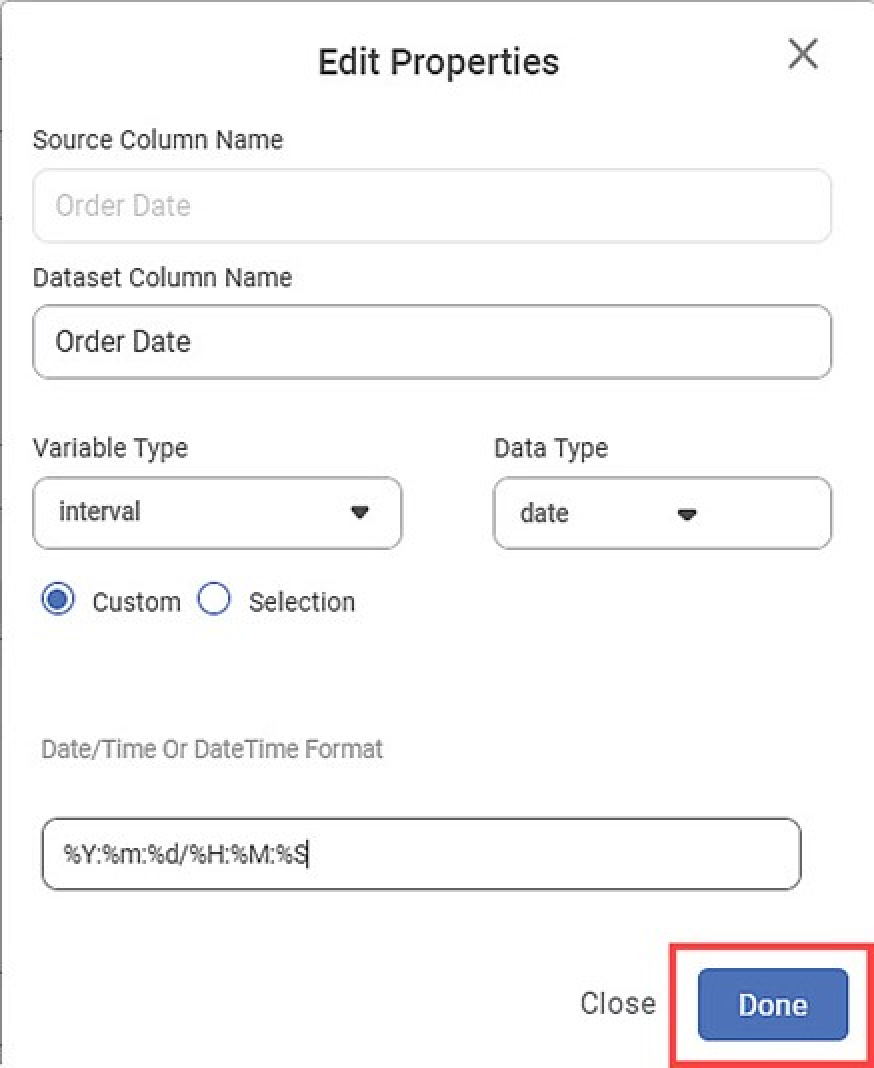
The Date/Time Or DateTime Format for the Interval type feature is configured.
The feature column in the explored dataset displays the values in the ISO standard date and time format, supported in Rubiscape (YYYY-MM-DDTHH:MM:SS).
Notes: |
|
File Encoding Formats
The encoding formats supported by Rubiscape are listed in the table below. Please note, selecting the encoding format is optional. The default value is none.
Asci | cp1258 | cp862 | gb2312 | iso8859_2 | mac_iceland |
big5 | cp273 | cp863 | gbk | iso8859_3 | mac_latin2 |
big5hkscs | cp424 | cp864 | hz | iso8859_4 | mac_roman |
cp037 | cp437 | cp865 | iso2022_jp | iso8859_5 | mac_turkish |
cp1006 | cp500 | cp866 | iso2022_jp_1 | iso8859_6 | ptcp154 |
cp1026 | cp720 | cp869 | iso2022_jp_2 | iso8859_7 | shif_jis |
cp1125 | cp737 | cp874 | iso2022_jp_2004 | iso8859_8 | shift_jis_2004 |
cp1140 | cp775 | cp875 | iso2022_jp_3 | iso8859_9 | shift_jisx0213 |
cp1250 | cp850 | cp932 | iso2022_jp_ext | johab | utf_16 |
cpl251 | cp852 | cp949 | iso2022_kr | koi8_r | utf_16_be |
cp1252 | cp855 | cp950 | iso8859_10 | koi8_t | utf_16_le |
cp1253 | cp856 | euc_jis_2004 | iso8859_11 | koi8_u | utf_32 |
cp1254 | cp857 | euc_jisx0213 | iso8859_13 | kz1048 | utf_32_be |
cp1255 | cp858 | euc_jp | iso8859_14 | latin_1 | utf_32_le |
cp1256 | cp860 | euc_kr | iso8859_15 | mac_cyrillic | Jtf_7 |
cp1257 | cp861 | gb18030 | iso8859_16 | mac_greek | utf_8 |
utf_8_sig |
|
|
|
|
|
Related Articles
Types of Datasets
Rubiscape supports a wide range of datasets that can be used to perform analysis. Availability of multiple types of datasets, makes sure that there are no limitations on what type of data you can use. The figure given below displays the types of data ...Applying Filter to a Feature
To filter a feature in a dataset, follow the steps given below: Perform steps 1 to 4 of Exploring a Dataset. The explored dataset is displayed on the Data page. Click the filter icon () next to the Feature that you want to filter. A filtering dialog ...Expression
Expression is located under Model Studio ( ) in Data Preparation, in the Task Pane on the left. Use the drag-and-drop method to use the feature in the canvas. Click the feature to view and select different properties for analysis. Refer to Properties ...Expression
Expression is located under Model Studio ( ) in Data Preparation, in the Task Pane on the left. Use the drag-and-drop method to use the feature in the canvas. Click the feature to view and select different properties for analysis. Refer to Properties ...Editing a Dataset
After you add or import a dataset, you can edit it. For adding or importing a dataset, refer to Adding a Dataset or Importing a Dataset. In Editing Dataset, you can, Edit the name and description of the dataset Select, remove, or modify the features ...