Sequence Generator
Sequence Generator is located under Model Studio ( .png) ) in Data Preparation, in the task pane on the left. Use the drag-and-drop method (or double-click on the node) to use the algorithm in the canvas. Click the algorithm to view and select different properties for analysis.
) in Data Preparation, in the task pane on the left. Use the drag-and-drop method (or double-click on the node) to use the algorithm in the canvas. Click the algorithm to view and select different properties for analysis.
Refer to Properties of Sequence Generator.
Properties of Sequence Generator
The available properties of the Sequence Generator while using the Use database sequence option are as shown in the figure given below.
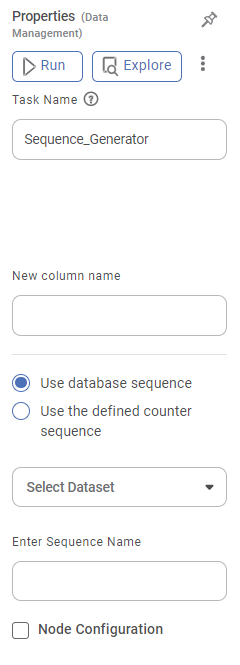
The table given below describes the different fields present on the Properties pane of the Sequence Generator.
Field | Description | Remark | |
| Run | It allows you to run the node. | - | |
| Explore | It allows you to explore the successfully executed node. | - | |
| Vertical Ellipses | The available options are
| - | |
Task Name | It is the name of the task selected on the workbook canvas. | You can click the text field to edit or modify the name of the task as required. | |
New column name | It allows you to specify the name of the Sequence Generator column. | — | |
Use database sequence | It is one of the options to specify the sequence generation method for your dataset. Select this option to use a sequence from an existing ODBC dataset. | — | |
Use the defined counter sequence | It is one of the options to specify the sequence generation method for your dataset. Select this option to define your counter sequence with the start value, increment value, and maximum value of the sequence. | For more details, refer to Defining Counter Sequence. | |
Select Dataset | It allows you to select a database to be used for sequence generation. |
| |
Enter Sequence Name | It allows you to specify the name of the sequence that is already defined in the selected dataset. | Available only if Use database sequence is selected. | |
Advanced | Node Configuration | It allows you to select the instance of the AWS server to provide control on the execution of a task in a workbook or workflow. | For more details, refer to Worker Node Configuration. |
Defining Counter Sequence
You can define your counter sequence to be used for sequence generation. There are three options to select the start value of the sequence.
The available properties of the Sequence Generator while using the Use the defined counter sequence option are as shown in the figure given below.
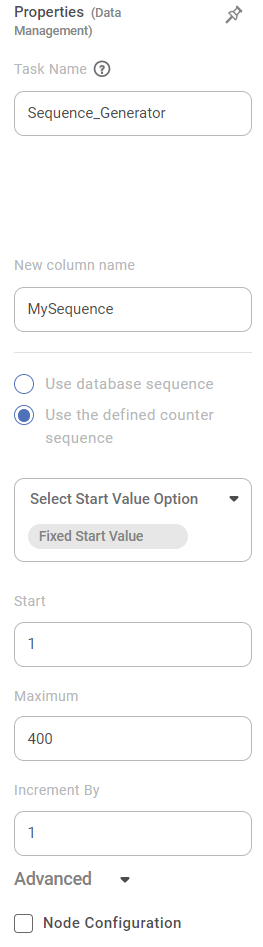
The table given below describes the different fields present on the Properties pane of the Sequence Generator for defining counter sequence.
Field | Description | Remark | |
Select Start Value Option | It allows you to select the option for the start value of the sequence. | The available options are –
| |
Start | It allows you to set the starting value of the sequence. |
| |
Maximum | It allows you to set the maximum value of the sequence. | Available only if Use the defined counter sequence is selected. | |
Increment By | It allows you to select the increment value for the sequence generator | Available only if Use the defined counter sequence is selected. | |
Current Value | This option is disabled currently. | — | |
Select Dataset | It allows you to select a database to be used for sequence generation. | You can use any dataset available in the current project. | |
Select Column | It allows you to select a column from the selected dataset. This column is used for sequence generation. |
| |
Advanced | Node Configuration | It allows you to select the instance of the AWS server to provide control on the execution of a task in a workbook or workflow. | For more details, refer to Worker Node Configuration. |
Example of Sequence Generator
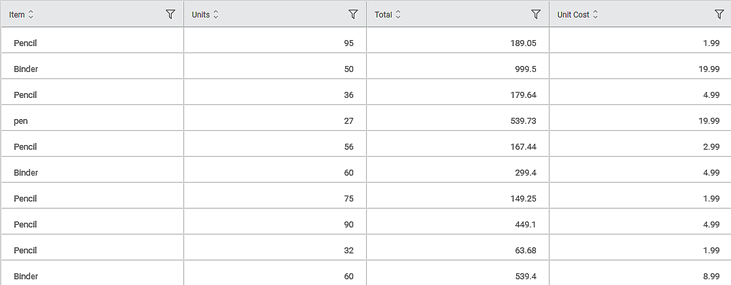
Consider a Sales dataset of different Items, their Unit Cost, Number of Units, and Total Price. A snippet of input data is shown in the figure given below.
The properties selected are –
Property | Value |
Sequence generator option | Use the defined counter sequence |
Start Value | 1 |
Increment By | 1 |
The result of the Sequence Generator is displayed in the figure below.
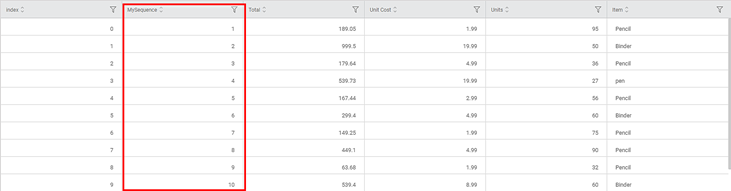
As seen in the above figure, a new column MySequence is added to the dataset.
The start value of the sequence is one, and for each row, the value is incremented by one.
Related Articles
Sequence Generator
Sequence Generator is located under Model Studio ( ) in Data Preparation, in the task pane on the left. Use the drag-and-drop method (or double-click on the node) to use the algorithm in the canvas. Click the algorithm to view and select different ...Contextual Data Tooltips
Tooltip configuration allows you to display additional information from the source dataset that is not directly plotted on the chart. This enhances data visibility by providing contextual insights when users hover over chart elements. Overview ...Introduction to Mobile View
Refer Navigate Mobile View to access the Mobile View. To ensure your dashboard is displayed correctly in the RubiSight Mobile Application, you need to configure the Mobile View. Charts can be organized in any desired layout, independent of the layout ...Show Hide Page in Rubisight Dashboard
1. Overview • The Show / Hide Page feature allows users to control page visibility within a dashboard. • This is useful for restricting access, staging content, or simplifying navigation. 2. Default Behavior • All newly created dashboard pages ...Accessing Dashboards in RubiSight Mobile Application
This section describes how to access dashboards, switch between pages, and navigate widgets in the RubiSight Mobile Application. Screenshots below illustrate key elements such as dashboard titles, page numbers, page switchers, and widget layout. On ...