Skip Rows
While creating a dataset, sometimes the first few rows contain the meta and other related information. This meta might not be required in the actual pre-processing and further analysis.
In Rubiscape, you can remove this meta and other unwanted first few rows using the Skip Rows function. When using this function, you can remove the selected number of rows starting from the first row, the header row.
In Rubiscape, you can remove this meta and other unwanted first few rows using the Skip Rows function. When using this function, you can remove the selected number of rows starting from the first row, the header row.
|
|
To view the impact of the Skip Rows function while creating an Excel dataset, follow the steps given below.
- Create an Excel dataset by uploading an Excel File. Refer to Creating Excel Dataset by Uploading Excel File in Creating Excel Dataset.
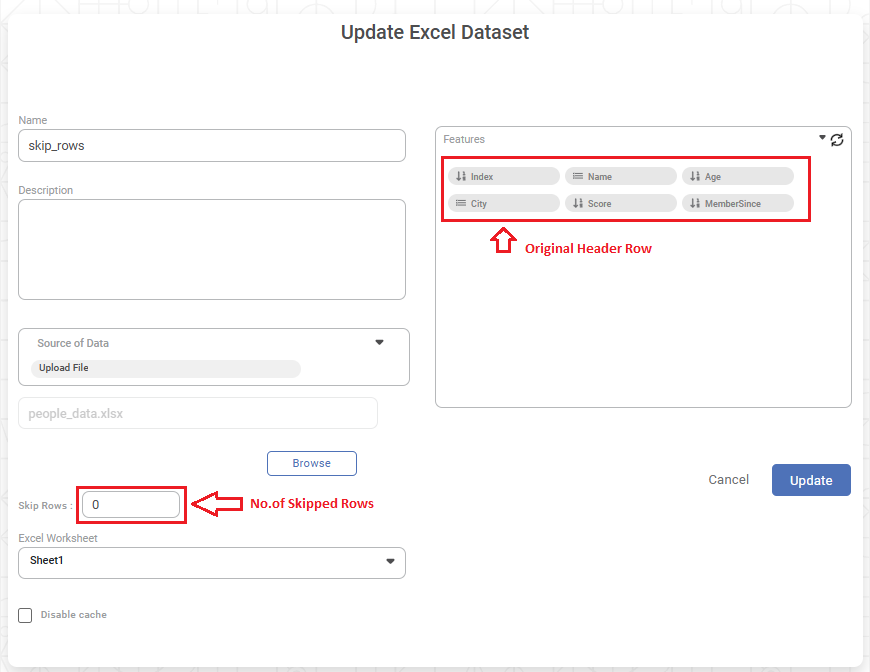
- Keep the value in the Skip Rows field unchanged. Thus, no rows are skipped. The Features field displays the header row titles for various columns. In this case, the original column headings like Row ID, Order ID, Order Date, Ship Date, and Ship Mode appear as the row titles.
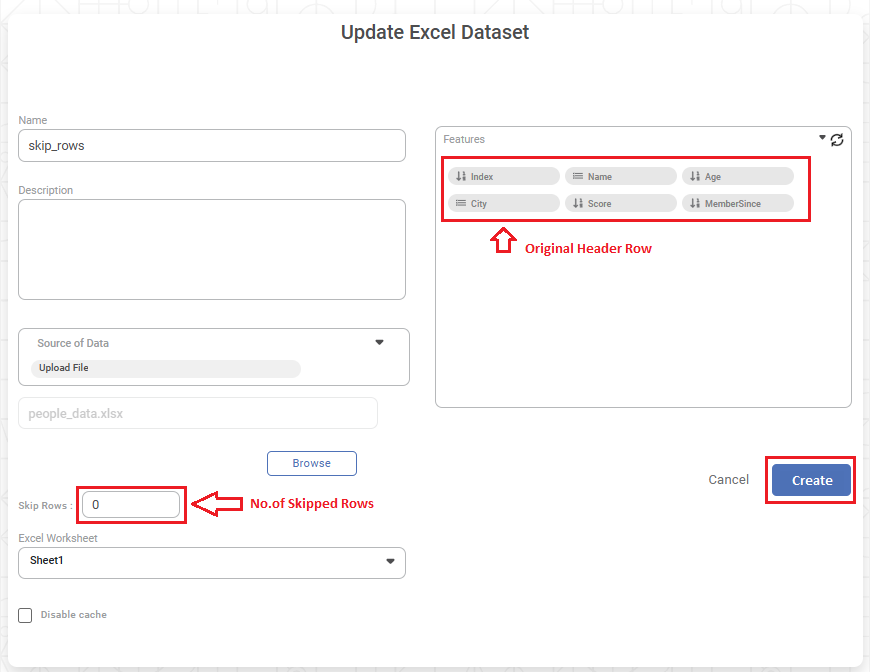
- Click Create.
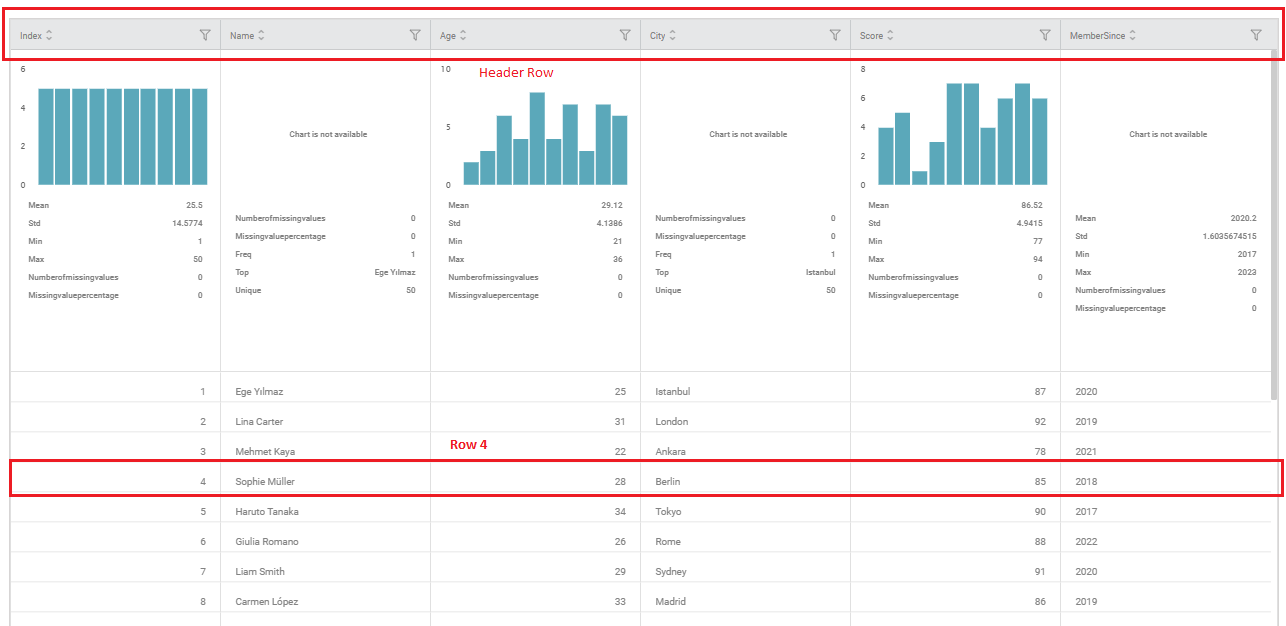
- On the Rubiscape homepage, hover over the dataset tile and click Explore. The dataset appears as shown below. You can see original column headings in the original dataset as the column headings in the Header Row.
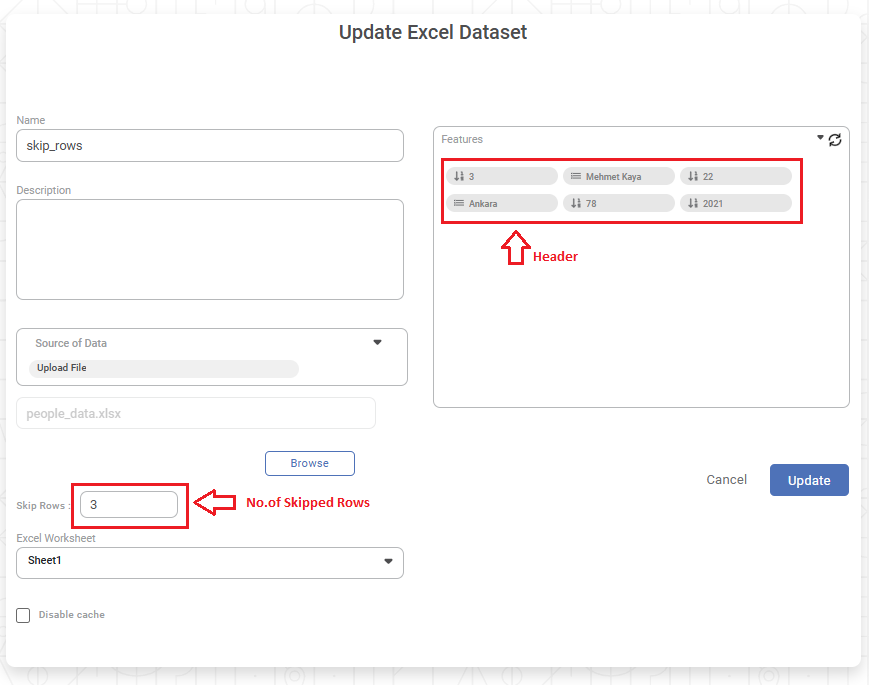
Now, let's edit this dataset while skipping three rows. - Edit the dataset and enter 3 in the field for Skip Rows.
- Click Refresh. You can see that the Header Row titles are changed. This is because the original header row and the first two rows containing actual data points (total rows = 3) are skipped. Now, the fourth row becomes the header row. The corresponding data points in the fourth row become the Header Row titles.
- Click Update.
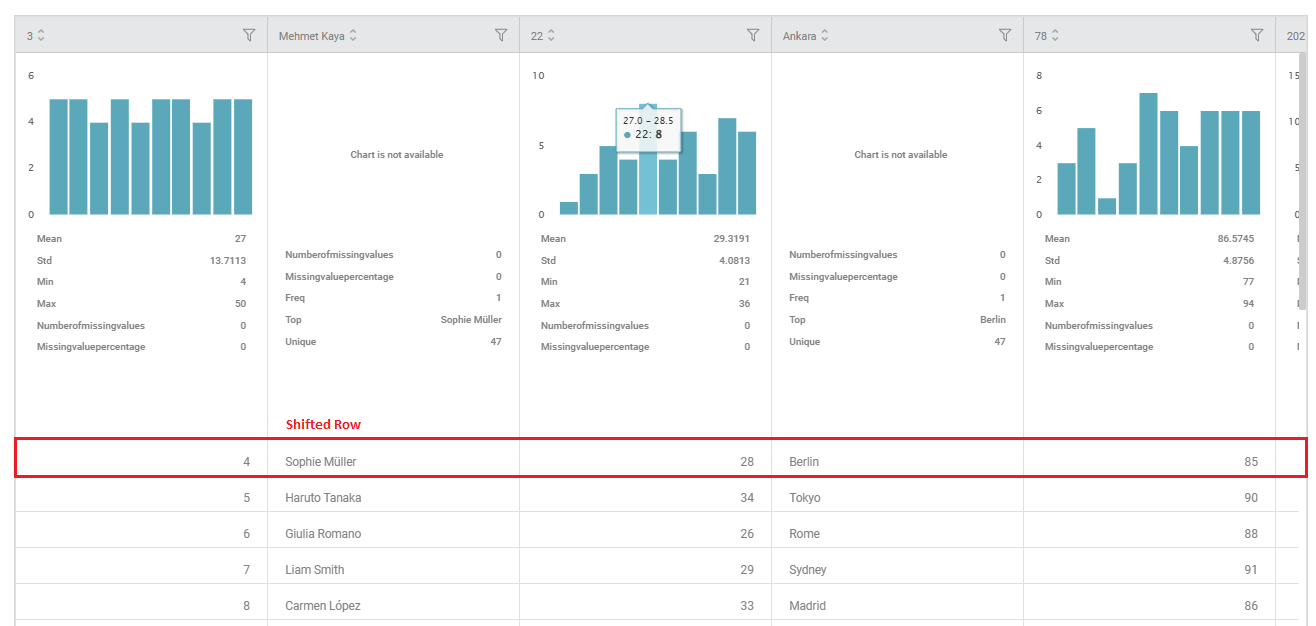
- On the Rubiscape homepage, hover over the dataset tile and click Explore. The dataset appears as shown below. You can see that Row 3 has shifted upwards and is not the Header Row.
Editing a Dataset with Skipped Rows
If you edit a dataset with skipped rows, a refresh icon (To view the impact of this refresh icon, follow the steps given below.
- Create an Excel Dataset with skipped rows. Refer to Skip Rows.
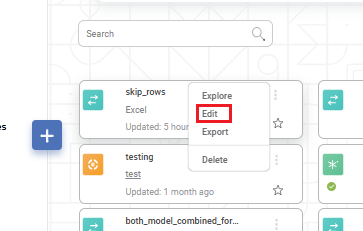
- On the Rubiscape homepage, hover over the dataset tile and click the vertical ellipsis (
- In the menu, click Edit.
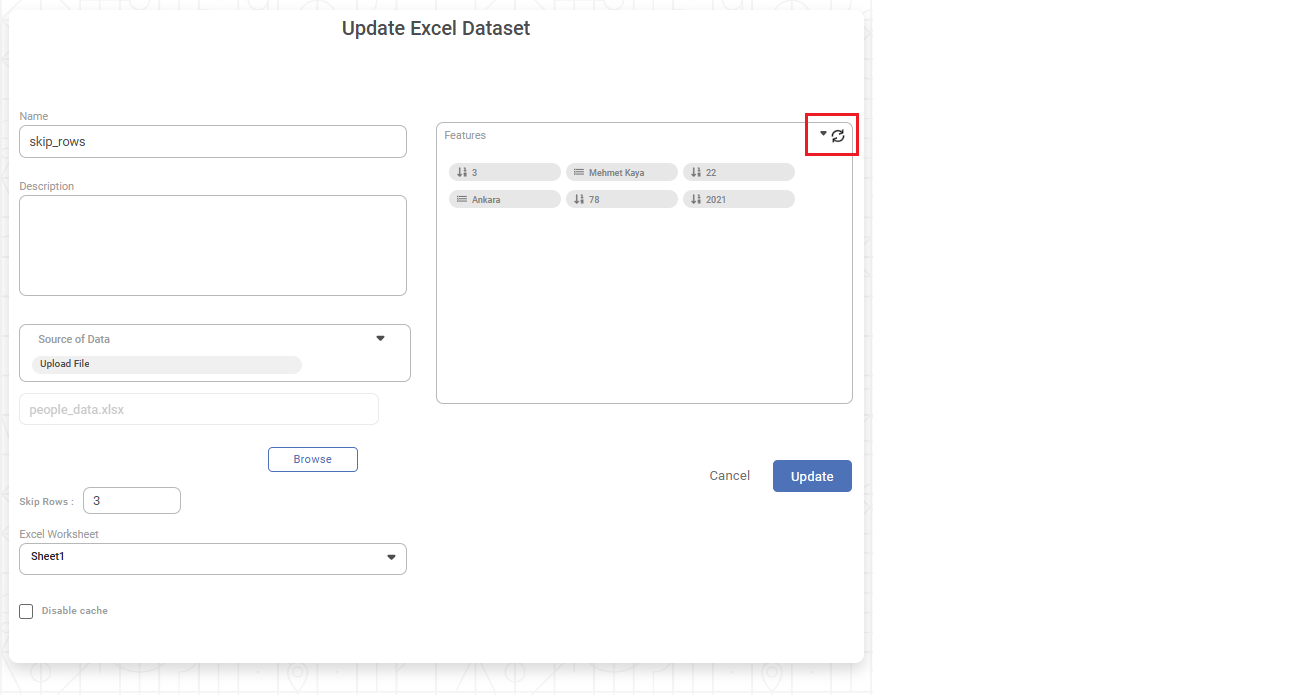
Update Excel Dataset page is displayed. You can see that
- The number of rows skipped is as selected, that is, three (3).
- A Refresh Icon (
) appears in the top right corner of the Features field.
Now, we upload another Excel sheet. For this,
- Click Browse.
- Select and upload another Excel sheet from your system.
- You can see that
- A new Excel file appears in the Browse field.
- The actual column headings do not appear in the Features field.
- Instead, values present in the 4th row of the new dataset appear in the Features field. For example, values like 3, CA_2016, Second Class and California appear as new Header Row titles. These are the data points contained in various columns in the actual dataset.
To update the Features field with the original column headings,
- Enter zero (0) in the Skip Rows field.
- Click the Refresh Icon (
The column headings present in the original dataset appear as Header Row titles in the Features Field. For example, Age, Attrition, Business Travel appear as the new Header Row titles.
Related Articles
Text
Creating Text Dataset To create a Text dataset, follow the steps given below. On the home page, click Create icon . The Product Selection page is displayed. Hover over the Data Connect tile and click Create Dataset. Dataset Selection page is ...Parquet
Creating Parquet Dataset Rubiscape supports Parquet files (.parquet) for dataset creation. To create a Parquet dataset, follow the steps given below. On the home page, click Create icon . The Product Selection page is displayed. Hover over the Data ...CSV
Creating CSV Dataset Rubiscape supports CSV files (.csv) for dataset creation. To create a CSV dataset, follow the steps given below. On the home page, click Create icon . The Product Selection page is displayed. Hover over the Data Connect tile and ...Excel
Creating Excel Dataset Rubiscape supports Excel files (.xls and .xlsx) for dataset creation. To create an Excel dataset using any of the modes, follow the basic steps given below. On the home page, click Create icon . The Product Selection page is ...Dynamic Calculations
Dynamic Calculations is a part of the Expression function. Using Dynamic Calculations, you can define formulas to create new features from the existing features of the dataset. Dynamic Calculations is one of the features available in the Expression ...