Adding a Parameter
Before using a Parameter, we add and create the Parameter in the Dashboard. In the RubiSight DATA pane, a Parameter is present as an independent entity.
To add a Parameter in a Dashboard, follow the steps given below.
- Open the Dashboard in edit mode. Refer to Editing a Dashboard.
The Dashboard is displayed. - Add a dataset to the Dashboard. Refer to Adding Dataset to the Dashboard.
- In the DATA pane, click the vertical ellipsis, and then click Add a Parameter from the listed options.
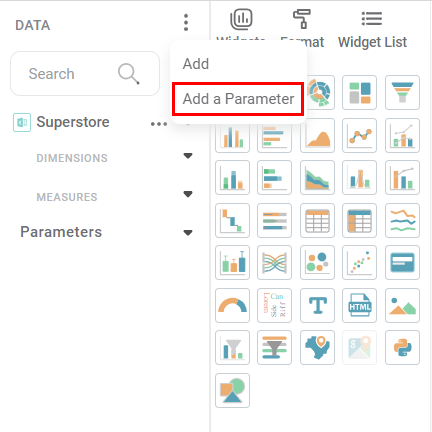
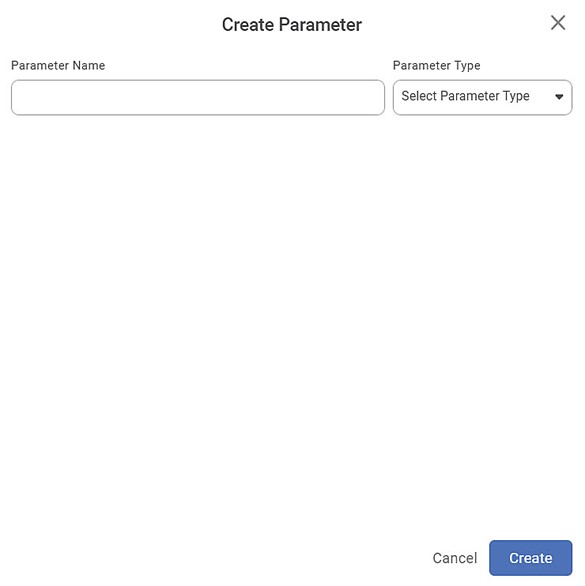
The Create Parameter page is displayed.
- In the DATA pane, click the vertical ellipsis, and then click Add a Parameter from the listed options.
Creating a Categorical Parameter
To create a Categorical Parameter, follow the steps given below.
- Perform steps 1 to 3 of Adding a Parameter.
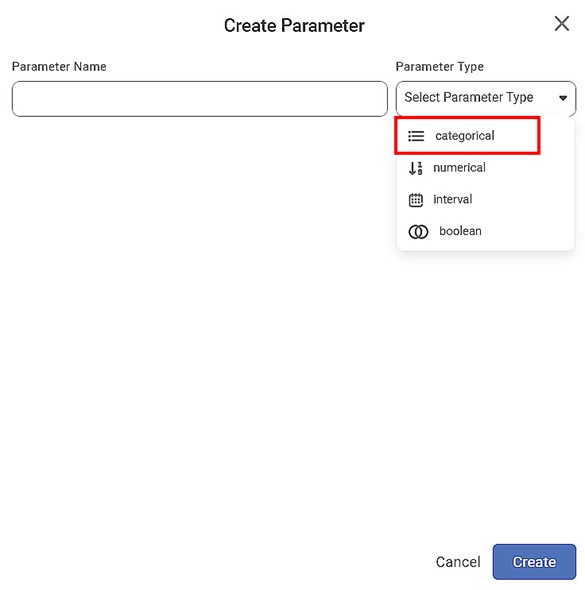
- On the Create Parameter page, enter the Parameter Name.

Select the categorical option from the Parameter Type drop-down.
Note:
When you select a Parameter Type, the fields to capture its details are displayed on the Create Parameter page.
Field
Description
Remark
Parameter Name
It is the name assigned to the newly created Parameter.
—
Parameter Type
It allows you to select the type of parameter you want to create.
The available options are,
- Categorical
- Numerical
- Interval
- Boolean
Current Value
It is the value that is used in the RubiSight application when we configure the Parameter.
- The user enters this value.
- This value is required for both User Input and List options of Parameter creation.
- This value is displayed by default when we plot the Parameter widget.
User Input
It allows you to manually enter the values to create a list of categorical variables.
The radio button is selected by default.
List
The radio button, when selected, allows you to import/upload a CSV file and use a column from the file.
- The Current value is mandatory in both User Input and List.
- The Current value should be present in
- the list created in the User Input method or
- a feature value from the uploaded CSV file in the List method.
- In the User Input field, enter categorical values one by one.
- Click the save icon (
 ) each time to save each entered value to create a list of the values.
 - Enter the required value in the Current value from the List
- Click Create.

The Categorical Parameter is created. The newly created Categorical Parameter appears in the DATA pane under Parameters.
Creating a Categorical Parameter using List
To create a Categorical Parameter using the List method, follow the steps given below.
- Perform steps 1 to 4 of Creating a Categorical Parameter.
- Click List.
- Click Browse located next to the Import CSV File field.
You are navigated to the folder structure of your system containing CSV files. Select and double-click the File that you want to use.
The file gets uploaded. The available categorical feature is listed in the Column field. The unique values of the categorical feature appear under List.Notes:
- If the dataset in the CSV file contains more than one Categorical feature, the features appear in the Select Column drop-down of the Column field. From the Select Column drop-down, you can select the feature that you want to add.
- The unique values of the selected categorical feature appear under List.
- If you import a CSV file that does not contain any Categorical feature, a message UPLOAD CATEGORICAL DATASET WHICH CONTAINS CATEGORICAL VALUES is displayed below the Import CSV File field.
- Type the unique value that you want to use in the Current Value
- Click Create.

The Categorical Parameter is created. The newly created Categorical Parameter appears in the DATA pane under Parameters.
Creating a Numerical Parameter
To create a Numerical Parameter, follow the steps given below.
- Perform steps 1 to 3 of Adding a Parameter.
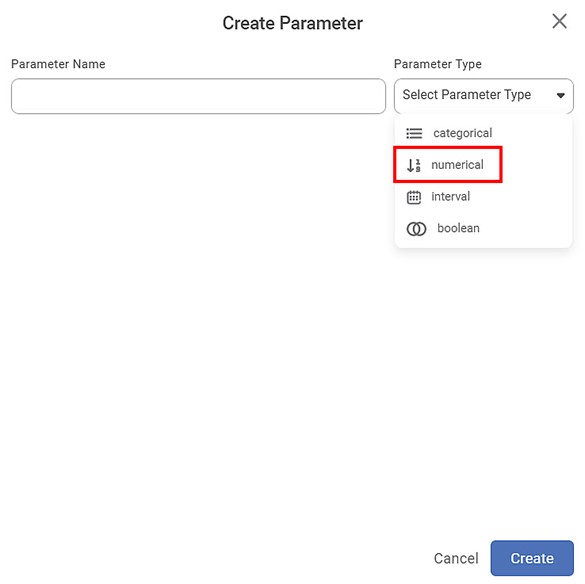
- On the Create Parameter page, enter the Parameter Name.
- Select the numerical option from the Parameter Type drop-down.
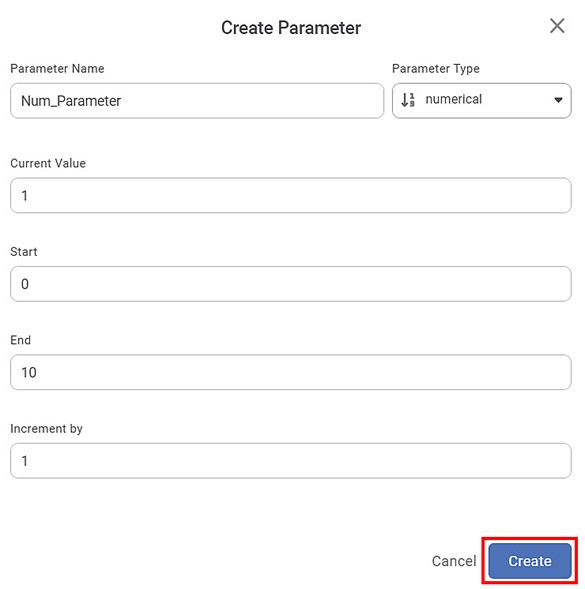
The Create Parameter page displays fields corresponding to the Numerical Parameter. - Enter the required values in the remaining data fields.
The table below describes the fields required to create the Numerical Parameter.Table: Fields required to create Numerical Parameter
Field
Description
Remark
Current Value
It is the value that is used in the RubiSight application when we configure the Parameter.
This value is displayed by default when we plot the Parameter widget.
Start
It is the minimum value of the Numerical Parameter.
—
End
It is the maximum value of the Numerical Parameter.
—
Increment by
This value decides the number by which the Parameter value increases in each step.
—
- Click Create.
The Numerical Parameter is created. The newly created Numerical Parameter appears in the DATA pane under Parameters.
Creating an Interval Parameter
To create an Interval Parameter, follow the steps given below.
- Perform steps 1 to 3 of Adding a Parameter.
- On the Create Parameter page, enter the Parameter Name.
- Select the interval option from the Parameter Type drop-down.
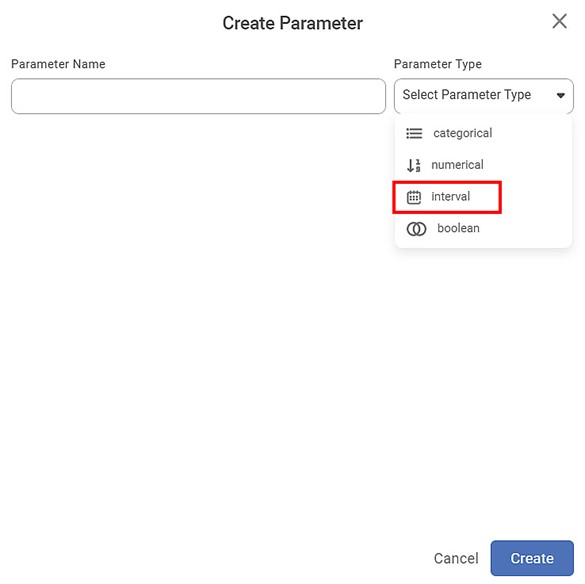
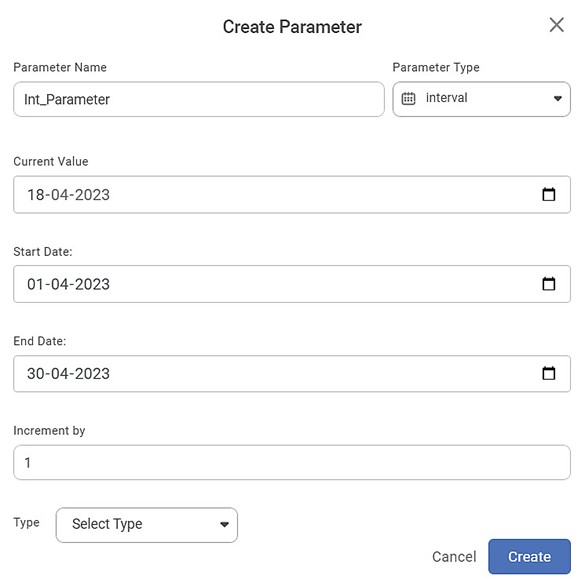
The Create Parameter page displays the fields corresponding to the interval parameter. - Enter the required values in the remaining data fields.
The table below describes the fields required to create the Interval Parameter.
Click Create.
The Interval Parameter is created. The newly created Interval Parameter appears in the DATA pane under Parameters.
Field Description Remark Current Value
It is the value that is used in the RubiSight application when we configure the Parameter.
- This field is disabled by default.
- It is enabled when you select the correct Start Date and End Date.
- This value is displayed by default when we plot the Parameter widget.
Start Date
It is the starting value of the time interval.
The date format is DD-MM-YYYY.
End Date
It is the ending value of the time interval.
The date format is DD-MM-YYYY.
Increment by
This value decides the number by which the Parameter value increases in each step.
—
Type
It allows you to select the type, which is the unit for the Increment by value.
The available options are –
- Days
- Weeks
- Months
- Quarters
- Years
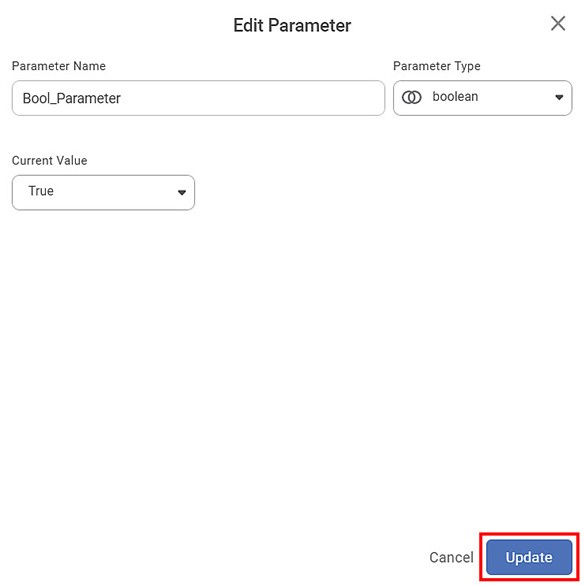
Creating a Boolean Parameter
To create a Boolean Parameter, follow the steps given below.
- Perform steps 1 to 3 of Adding a Parameter.

- On the Create Parameter page, enter the Parameter Name.
- Select the boolean option from the Parameter Type drop-down.
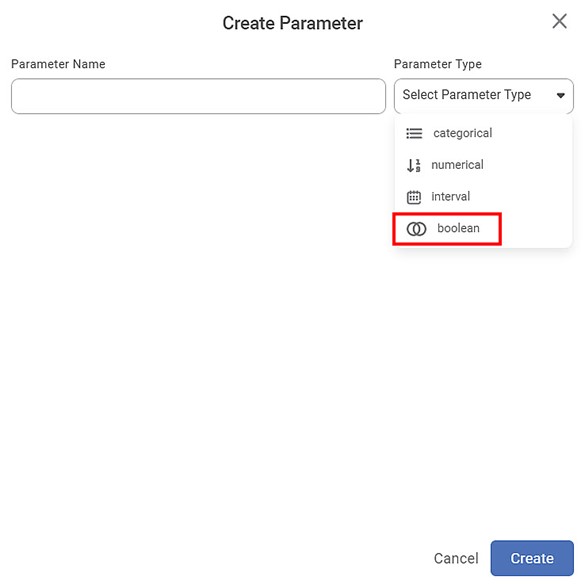
The Create Parameter page displays the field corresponding to the Boolean parameter.
Select a value from the Current Value drop-down.
Note:
The default value in the Current Value field is True. The available options for the Current value are True and False.
- Click Create.
The Boolean Parameter is created. The newly created Boolean Parameter appears in the DATA pane under Parameters.
Related Articles
Adding Calculated Column to Dataset
The created Parameter can be used in the Dashboard on any page. To use the Parameter, we first create a Calculated Column based on the Parameter. To create a Calculated Column, follow the steps given below. Open the Dashboard in edit mode. Refer to ...Adding a Variable
You can add your own variable which can be used anywhere in the workbook or workflow. The below steps mention how to add a variable in a workbook. Similar steps can be performed to add a variable to a workflow. To add a variable at the workbook ...Adding a Variable
You can add your own variable which can be used anywhere in the workbook or workflow. The below steps mention how to add a variable in a workbook. Similar steps can be performed to add a variable to a workflow. To add a variable at the workbook ...Adding a Dataset
A dataset is global and shared across the same workspace. Consider adding a dataset before creating a project. You can add a dataset from the supported data sources. The added datasets can be used in multiple projects. To add a dataset, follow the ...Deleting a Parameter
You can delete a Parameter from the Dashboard if it is no more required. To delete a Parameter, follow the steps given below. Open the Dashboard in edit mode. Refer to Editing a Dashboard. The dashboard is displayed. In the DATA pane, click the ...