Refreshing Dashboard using Scheduled Workflow
The dashboards that you create are static, meaning the dashboard views do not change if the data they represent is changed. For this, you can use the refresh function provided by RubiSight. Refer to Refreshing a Dashboard.
However, there can be instances that data keeps changing often, and the dashboards that are plotted using that data need to be auto-refreshed without any user intervention.
You can achieve this auto-refreshing of the dashboard by scheduling workflows.
The auto-refresh of dashboards involves two main steps:
- Create Workflow for Cache Refresh
- Schedule the Workflow to run at a specified time interval
To enable auto-refreshing of the dashboard by scheduling workflow, follow the steps given below.
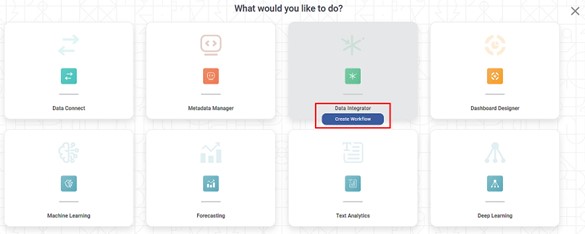
- On the home page, click the Create icon (
 ).
). - Hover over the Data Integrator tile and click the Create Workflow button.
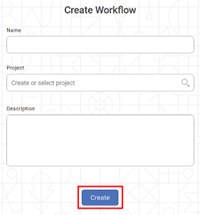
Create Workflow page is displayed. - Enter the Name for your workflow.
Enter the name in the Project field to create a new project.
Notes:
- The workflow is created under the entered project name.
- You can also type the name of the existing project in the Project field to select the project.
- The project name is mandatory.
- Enter the Description for your workflow.
- Review all fields and click Create.
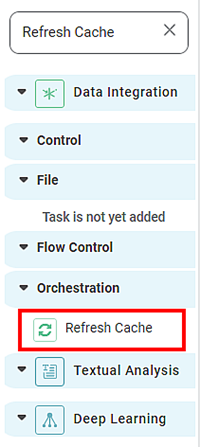
The workflow is created, and the workflow canvas is displayed. - Follow the path (Data Integration >> Control >> File >> Orchestration >> Refresh Cache) from the left Task Pane, drag and drop Refresh Cache on the workflow canvas.
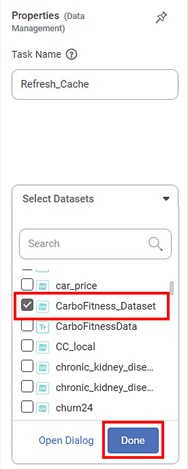
- Select the Refresh Cache node.
The properties pane is displayed on the right side. From the Select Datasets drop-down, select the datasets for which the cache needs to be refreshed.
Note:
You can select more than one dataset.
- After selecting the datasets, click Done.
- Hover over the Refresh Cache node and click the ellipsis, and then click Run.

- Schedule this workflow. Refer to Scheduling a Workflow.
After the schedule is successfully created, the workflow executes at the specified time interval, and the dashboard is refreshed based on the latest data.
Notes: |
|
Related Articles
Configuring Dashboard from Mobile View
Refer Navigate Mobile View to access the Mobile View. Refer Mobile View introduction for getting details of the sections available in the Mobile View and why this configuration is required. Navigate to Mobile View of canvas for configuring dashboard ...Refreshing a Dashboard
Refreshing a dashboard helps you fetch the latest data and display the most current views. To refresh a dashboard, follow the steps given below. Open the Workspace that includes your dashboard. Refer to Changing Workspace. On the home page, click ...Refreshing Metadata of Dataset
Rubiscape supports the Metadata Refresh feature for datasets, as listed below. Google Spreadsheet dataset RDBMS dataset File type dataset from AWS S3 cloud storage Applicable to all flat files (Excel, CSV, JSON, Text) This feature is available in ...Export to PDF/PPT using Dashboard Schedule
In RubiSight, you can export a dashboard using the Export functionality. Refer to Exporting a Dashboard. You can not only schedule this export, but also send the dashboard pages as PDF via email, at a stipulated date and time. Notes: You can schedule ...Setting Variable Values from Scheduled Pipeline Execution
This functionality allows users to assign specific values to pipeline variables at the schedule level. When a pipeline runs through a schedule, the variable values defined in that schedule override the global variable values. This enables dynamic, ...