Write Strategy Tag
Write Strategy Tag or WSTag, is a feature present in the Expression functionality under Data Preparation. It is used for modifying a dataset based on certain conditions. These are Insert, Update, and Delete. It means that, while using the Writer functionality, the WS Tag is used to insert, delete, or update data in the existing dataset.
While building an Expression, you can tag the individual data points in a dataset as Insert, Update, or Delete. Then, while updating the TemplateTable, you can select the Tag Driven option that considers only the tagged data points while performing the dataset operations.
Adding a Write Strategy Tag
To build an expression to use the WSTag, follow the steps below.
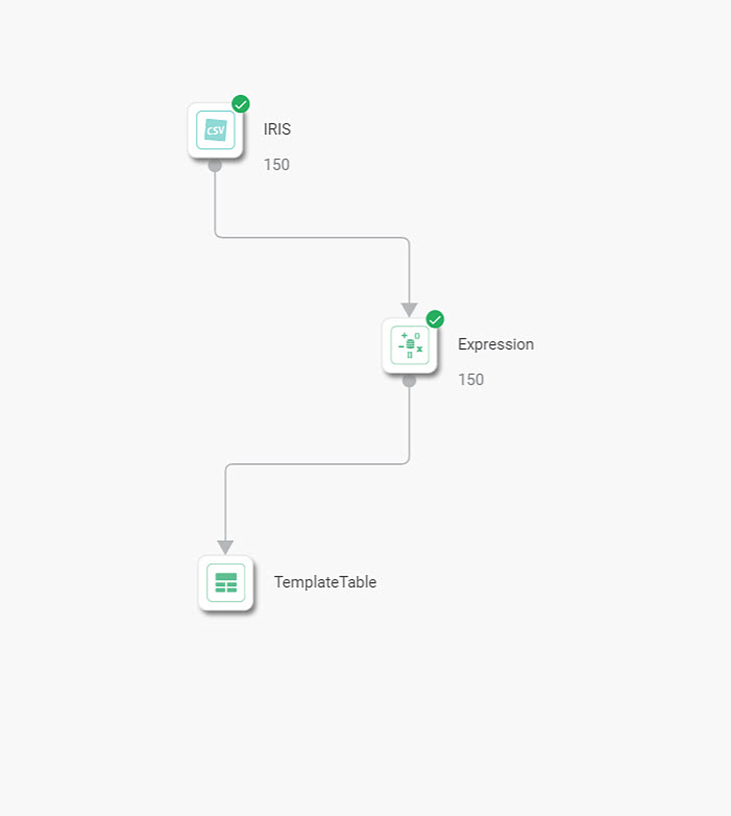
Build your algorithm flow. Refer to Building Algorithm Flow in a Workbook Canvas.
Add the Expression node to add a new feature in the dataset. Refer to Expression in Algorithm Reference Guide.
Connect the Expression node to the Reader node in your workbook.
Select the Expression node. The Properties pane is displayed.
- From the Properties pane, click Add Expression Feature.
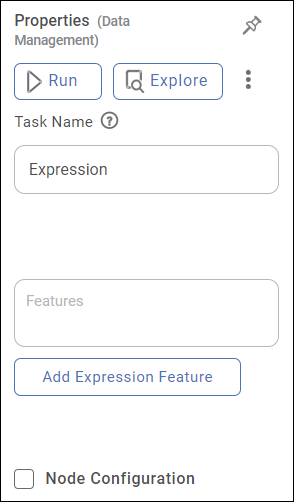
- The Feature Definition page is displayed. There are two values for WSTag, true and false. By default, the value is false. It means that, by default, the WSTag is not applied in the expression, and you can use the Feature Definition Page as a usual Expression Builder.
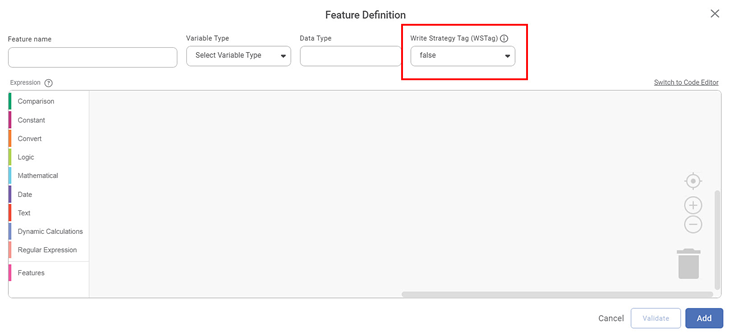
- To add a WSTag, select true from the drop-down. You are navigated to the Code Editor windows.
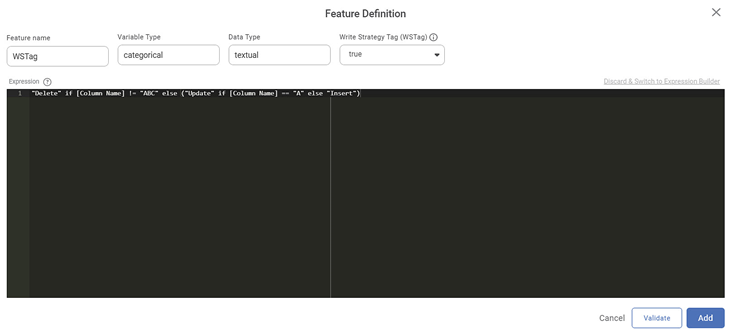
- In the following example, we select a IRIS dataset as the Reader. It contains a column named Id. We write the Line of Code as follows.
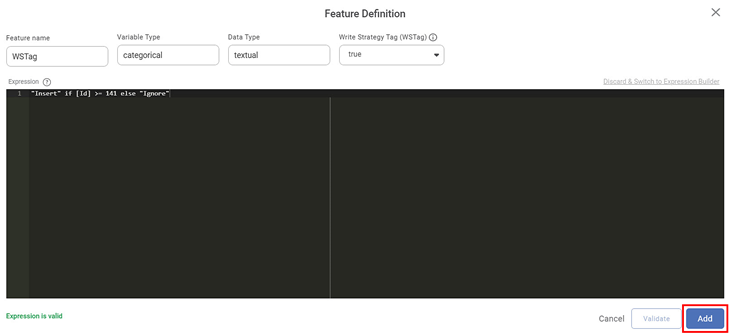
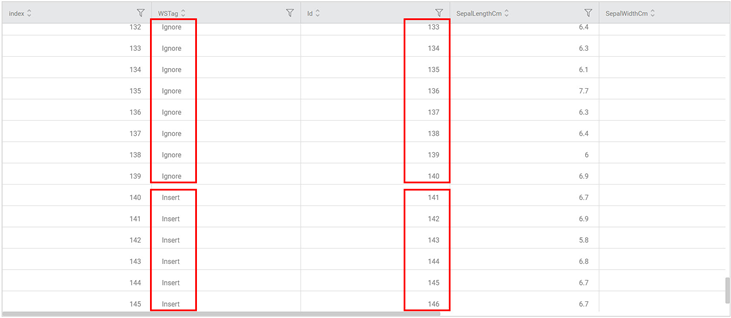
- "Insert" if [Id] >= 141 else "Ignore"
- It means that,
- When this TagFeature is used to update a TemplateTable, only Ids >= 141 are considered; the ids before 141 are ignored.
- Click Validate to validate the newly added expression.
- After the expression is validated, click Add to add the new Tag. The new feature is added, the Code Editor window is closed, and you are returned to the workbook canvas
- Run the algorithm and explore its result.
The Data Page is displayed. A snippet of the output data is shown in the figure below.
On the Data Page, you can see that,
A new column named WSTag is added to the data.
Updating Template Table Using WSTag
To write to TemplateTable using the WSTag, follow the steps given below.
Add a tag feature to the dataset using the Expression node. Refer to Adding a Write Strategy Tag.
Add the TemplateTable node to the canvas to modify or update the dataset. Refer to Writing to Template Table.
Connect Expression node to TemplateTable.
Select the TemplateTable. The Properties pane is displayed.
The table below describes different fields present in the properties of TemplateTable.Field
Description
Remark
Run It allows you to run the node. - Explore It allows you to explore the successfully executed node. - Vertical Ellipses The available options are
- Run till node
- Run from node
- Publish as a model
- Publish code
- Task Name
It displays the name of the selected task.
You can click the text field to edit or modify the task's name as required.
Drop and Create
It allows you to determine whether to drop an existing table.
If selected, the existing table schema is dropped, and a new table schema is created.
Select Dataset
It allows you to select the dataset that you want to modify.
You can select RDBMS or ODBC datasets available in the current Workspace.
Table Name
It allows you to enter the table's name you want to create or modify.
If a table with the same name exists, either data is added to it or a new table is created.
Select Strategy
It allows you to select the operation you want to perform on the table.
The available options are –
Insert – Insert entire input data into the table.
Update – Update rows of existing data using the entire input data.
Delete – Delete rows of existing data using the entire input data.
Tag Driven – Performing either Insert, Update, or Delete operations using the tags given to each row of the input data.
For this feature, select the Tag Driven option.
Select Primary Key Columns
It allows you to select the primary key of the table.
—
Select Tag Column
It allows you to select the tag column you have created using the Expression function.
It is applicable only if we have applied the WSTag expression to the dataset.
Clear the Drop and Create checkbox before selecting a strategy.
From the Select Dataset drop-down, select the name of the dataset that contains the table you want to update.
Enter Table Name.
Note:
If a table by this name exists in the dataset, then data is modified from the existing table, or a new table is created with the updated data.
From the Select Strategy drop-down, select Tag Driven.
Note:
To see the Tag Driven option in the Select Strategy drop-down, you need to clear the Drop and Create checkbox.
Select the primary key from the Select Key Columns drop-down.
Select Tag Columns drop-down and select the tag column you have created using expression.
Click Run to run the workbook or click the ellipsis on the TemplateTable node and click Run.
After successful execution, a confirmation message is displayed. The table with Table Name is updated in the dataset specified by Dataset Name. In this example, The IrisTempTable table is updated in the existing Demo 2 dataset selected from the Select Dataset drop-down.
Note: | The Input data can be of any type. But the target dataset should always be of RDBMS type. |
To test the working of WSTag, follow the steps given below.
Create a dataset with the selected dataset (In this example, Demo 2). Refer to Creating an RDBMS dataset. While creating the dataset, select the table name given in step 7 of Updating Template Table Using WSTag (In this example, IrisTempTable)
Drag and drop the dataset on Workbook canvas (Demo 2).
Run the dataset node. After successful execution, a confirmation message is displayed.
Explore the dataset node. The data in the selected table is displayed as shown in the figure below.
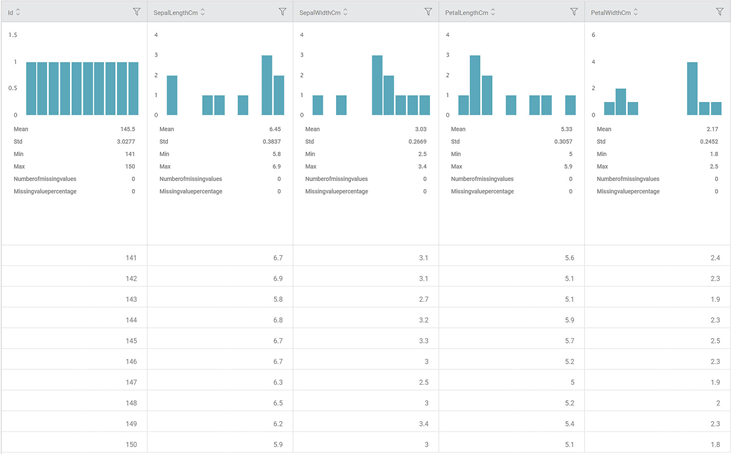
In this example, the condition selected in step 7 of Updating Template Table Using WSTag is id >= 141. Refer to Adding a Feature Definition under Storing Result Using Tag Feature to view the condition.
As seen in Dataset After applying WSTag, only the data points where id >= 141 are inserted into the selected dataset.
Notes: | The Tag feature added to the dataset using the Expression node is not added to the target table of the selected RDBMS dataset. Instead, it is used only to decide whether a particular data point is considered or not while performing a specific action (insert/update/delete/ignore) using the TemplateTable functionality. |
 info
infoRelated Articles
Write Strategy Tag
Write Strategy Tag or WSTag, is a feature present in the Expression functionality under Data Preparation. It is used for modifying a dataset based on certain conditions. These are Insert, Update, and Delete. It means that, while using the Writer ...Writing Data to the Template Table
You can store the result of algorithm flow or the Reader to a dataset table. Note: You can write to an RDBMS or ODBC (SQL, MySQL, PostgreSQL, or Oracle) datasets only. To write the output data to a template table, follow the steps given below. Build ...Writing into Template Table
You can store the result of algorithm flow or the Reader to a dataset table. Note: You can write to an RDBMS or ODBC (SQL, MySQL, PostgreSQL, or Oracle) datasets only. To write the output data to a template table, follow the steps given below. Build ...Custom Functions in RubiPython
Reading Data from File A sample Python code to read data from file is shown in the image below. The table below explains the above code snippet. Line of Code Result getReaderData(“datasetName”,“subdatasetName”) This custom function checks the type of ...Custom Functions in RubiPython
Reading Data from File A sample Python code to read data from file is shown in the image below. The table below explains the above code snippet. Line of Code Result getReaderData(“datasetName”,“subdatasetName”) This custom function checks the type of ...