Export to PDF/PPT using Dashboard Schedule
In RubiSight, you can export a dashboard using the Export functionality. Refer to Exporting a Dashboard.
You can not only schedule this export, but also send the dashboard pages as PDF via email, at a stipulated date and time.
Notes: |
|
To schedule a dashboard export, first, open the dashboard in Edit Mode. For this, follow the steps given below.
- Open the Workspace that includes your dashboard. Refer to Changing Workspace.
- On the home page, click Dashboards. Recent dashboards for the selected workspace are displayed.
- Hover over the dashboard and click View. The dashboard is displayed in the view mode.
- To display the dashboard in the edit mode, click Edit Mode in the top-right corner on the function pane.
To schedule the Dashboard export, follow the steps given below.
- On the function pane, in the top-right corner, click the ellipsis (
 ). The dashboard tasks menu is displayed.
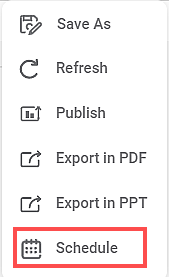
- From the drop-down list, click Schedule. Schedule window is displayed.
- Click Create New Schedule. Scheduled exports, if any, are displayed in this window.
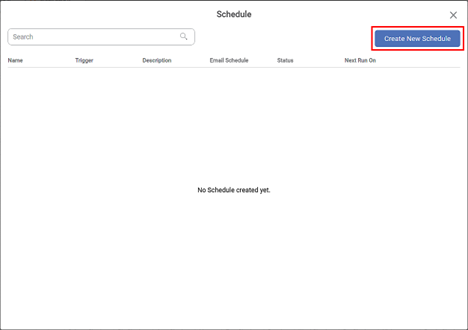
Create Schedule page is displayed. It contains two parts.
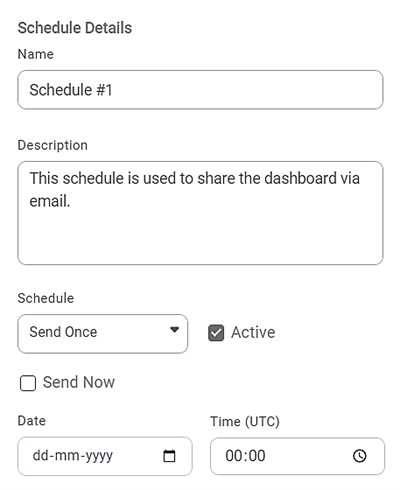
- Schedule Details – to schedule export of the dashboard by schedule type, date, and time
- Send Email – to schedule export of the dashboard via email at the scheduled date and time - In the Schedule Details section, Enter a suitable Name and Description for your Schedule.
- Enter Schedule Type. You can select from the Schedule Type options given in the table below.
Select Schedule Status.
Schedule Type Description Related Fields Send Once For one-time export of the dashboard.
- Date
- Time
Daily For daily export of the dashboard.
- From Date
- To Date
- Time
Weekly For weekly export of the dashboard.
- From Date
- To Date
- Day of the week (only one day can be selected)
- Time
Monthly For monthly export of the dashboard.
- From Date
- To Date
- Date of the month (only one date can be selected)
- Time
Send Now For immediate export of the dashboard (after creating the schedule).
- No selectable fields available.
- The Save button at the bottom of the Send Email section changes to Save and Send.
FortnightlyFor export after 15 days from the start date - From Date
- To Date
- Time
Half-MonthlyFor export on 1st and 16th and so on- From Date
- To Date
- Time
Last Friday of the MonthFor export on last friday of the month- From Date
- To Date
- Time
QuarterlyFor export on each quarter change- From Date
- To Date
- Time
Half-YearlyFor export in the interval of 6 months in the defined duration- From Date
- To Date
- Time
YearlyFor export in the interval of 1 year (12 months) in the defined duration- From Date
- To Date
- Time
Note:
Make sure that all schedule Time is created as per the Coordinated Universal Time (UTC) format.
You can either keep the schedule Active or make it Inactive.Schedule Status
Active Checkbox
Description
Active
Selected

- This is the default setting.
- All scheduled exports are active by default.
Inactive
Cleared

You can make a schedule inactive if you want to create it now but implement it later.
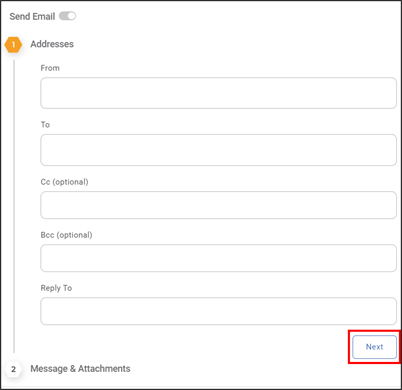
In the Send Email section, you can create an email to be sent to the recipient(s). Here, you can add recipients and add or remove dashboard pages from the list which you want to export. The Send Email section contains two parts.
- Addresses
Message & Attachments
Notes:
- You can choose not to send email by disabling the Send Email radio button (
 ). In that case, the entire section gets disabled.
 - In such a case, the created schedule is used to refresh the dashboard at the given date and time, or create a PDF file of the dashboard as required.
- In case the Active selection is false, nothing happens at the backend. It simply creates a schedule entity which can later be activated.
In the Addresses section,- You can choose not to send email by disabling the Send Email radio button (
- Enter the recipient's email addresses in the To field. (mandatory)
- Enter the email addresses of other recipients in the Cc and Bcc fields.
- Enter the email address to which the recipient(s) can revert (in response to the email) in the Reply To field.
Click Next. The Messages & Attachments menu is activated.
Notes:
- Make sure that the email addresses you enter are registered in the specified domain.
- On receiving the email, if you click Reply or Reply All button, the email address entered in the Reply To field is automatically populated as the primary recipient.
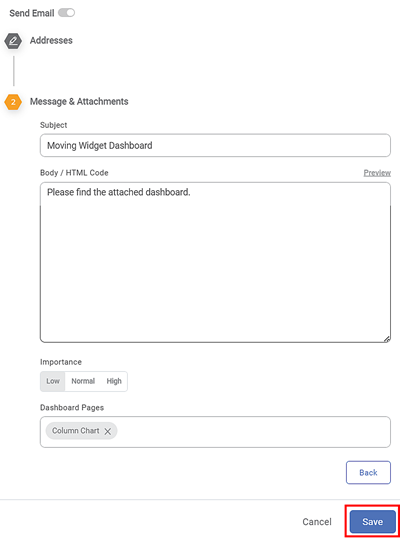
In the Messages & Attachments section,
- Enter a Subject for the email.
Enter a textual message as email body, or an HTML Code in the Body/HTML Code box.
Notes:
- HTML codes are used in case you want to
- highlight any part of the email body
- insert an image, reference or an attribute in the email body
- insert hyperlink to a document, the URL for a website or make a part of the email body Bold or Italics.
- You can click Preview to view how the coded content would appear to the recipient in the actual email.
- HTML codes are used in case you want to
- Select the level of Importance for the email to be set as priority. You can select from Low, Normal, and High levels of importance according to the domain used and your organization's policy guidelines.
- Configure the options for the Attachment as below:
Click Save. The email is scheduled to be sent at the scheduled date and time.
Notes:
- All available pages of the dashboard are selected for export by default.
- If you do not want to export any of the pages, you can remove them by clicking the Close Icon (
 ).
). - By clicking inside the Dashboard Pages field, you can also see a list of all pages in the dashboard. You can select any or all pages to export.
- All selected pages appear in the Dashboard Pages field.
- You can move to the beginning of the Send Email section for reconfiguring the email by clicking Back.
You are navigated back to the Schedule window. In the window, you can see a list of all the created schedules as shown below.
You can viewSchedule name Schedule trigger, which is the schedule type Schedule description, Whether an email has been generated to schedule an export Actual status of Schedule (Active/Inactive) The scheduled next run date 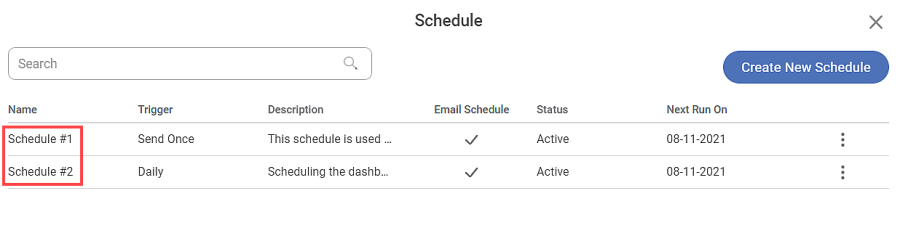
Notes:
- For Send Now type of schedules, the Status is always Inactive since the email has already been triggered.
- For Send Once type of schedules, the Status becomes Inactive as soon as the email is triggered.
- For Daily, Weekly and Monthly types of schedules, the Status becomes Inactive after the last date (To Date) has lapsed.
- The number of Active schedules is displayed in the Dashboard Tasks Menu under Schedule in the function pane on the top right corner of the dashboard.
- You can view and use the Edit or Delete Schedule options by clicking the vertical ellipsis (
 ) corresponding to a schedule.
To
configure Data Alerts, refer Configure
Data Alerts in Dashboard Schedule.
Related Articles
Configuring Dashboard from Mobile View
Refer Navigate Mobile View to access the Mobile View. Refer Mobile View introduction for getting details of the sections available in the Mobile View and why this configuration is required. Navigate to Mobile View of canvas for configuring dashboard ...Show Hide Page in Rubisight Dashboard
1. Overview • The Show / Hide Page feature allows users to control page visibility within a dashboard. • This is useful for restricting access, staging content, or simplifying navigation. 2. Default Behavior • All newly created dashboard pages ...Data Alerts in Dashboard Schedule
The Data Alerts option is available within the Dashboard Schedule configuration. It allows users to receive automated alerts based on predefined conditions. When a configured condition is met, an email notification is sent to the specified recipient ...Exporting a Dashboard
Exporting a dashboard helps you to store/save the dashboard on the system. You can then share or view the dashboard in PDF and PPT format. When you export a dashboard, all the pages present in the dashboard are exported. To export a dashboard, follow ...Canvas Grid Functionality
Grid support helps designers align and organize visuals precisely on the canvas using an underlying layout structure. Overview Grid is available for Rubisight Designers The grid is visible only in Edit Mode It helps in maintaining consistent spacing ...