MLOPS - Machine Learning Operations
Introduction: Why Rubiscape MLOps?
Rubiscape MLOps provides an end-to-end
environment for building, tracking, publishing, and serving machine learning
models. It ensures experiment reproducibility, streamlined deployment, and
centralized model governance across the machine learning lifecycle.
Unified Workflow: Prepare Data → Configure
Nodes → Run Experiments → Track & Compare Runs → Publish Model → Register
& Version → Serve / Download → Deploy / Use in Custom Code
Section 1 — Experiment Tracking (Log)
The Experiment Tracking feature in
Rubiscape allows you to execute, monitor, and log machine learning experiments.
It records all key details such as parameters, metrics, and configurations
across multiple model runs — ensuring transparency, reproducibility, and
performance comparison for every ML experiment.
Feature Flow: Run Nodes → Track Parameters
→ Log Metrics → Explore Results
Step-by-Step Instructions
1️⃣ Open Rubiscape Studio and navigate to
your workflow containing ML nodes such as Lasso Regression or Random Forest.
2️⃣ Run experiments with and without
hyperparameter tuning. Configure and execute both scenarios — each run is
automatically logged.
3️⃣ Explore all runs under the Explore tab.
Review metrics such as AIC, MAE, R-Square, and BIC for each run.
4️⃣ Click Publish as a model from the kebab
menu or Explore page. The modal will display all runs with their parameters and
metrics.
Result: All experiments are
logged.
Section 2 — Model Registry (Repository)
Model Registry acts as the central
repository for all published models, including their versions, descriptions,
and tags. It provides complete traceability and easy management of model
lifecycle operations.
1️⃣ Access the Publish option from the
Explore page or kebab menu.
2️⃣ Review the run history, choose a model
to publish, and open the metadata form.
3️⃣ Fill in Name, Alias, Description, and
Tags (use Add to include key-value pairs).
4️⃣ Click Save to publish the model, which
will now appear in the Model Registry with a unique ID and version.
Section 3 — Model Serving
Model Serving enables users to load,
consume, or download models dynamically offline deployment.
1️⃣ Open Model Registry and select a model
entry.
2️⃣ Review metadata, versions, and model
details displayed on screen.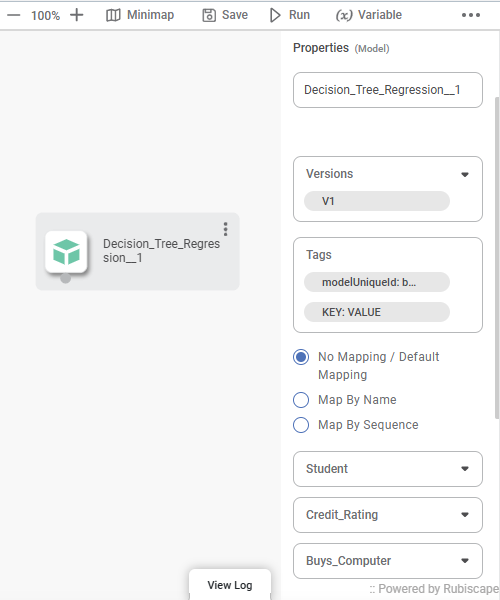
3️⃣ Click Download to obtain model
artifacts (including serialized model files and dependencies).
Tip: Always verify the correct version
before serving or deploying to ensure consistent performance.
Section 4 — Experiment Tracking for Custom Code (MLflow
Integration)
Rubiscape supports MLflow middleware
integration in RubiPython environment or any External python environment. This
allows developers to start experiment runs, log parameters, and log models
directly from code.
1️⃣ Open RubiPython or External python
environment.
2️⃣ Use MLflow methods to start runs and log models. Example: Using Rubipython:-```clf =
RandomForestClassifier(**paramsDict)
clf.fit(X_train,
y_train)
#Log parameters
and model
result =
logparamsAndModelFunction('from_rubiPython',X[:5], clf, paramsDict,None
)
``` Using External Environment:-```
api = backend_url + "models/logparamsAndModelFunction/"print("Sending
data to API...")
r = requests.post(api, headers=headers,
data=json.dumps(data, default=str))
print(f"Response status:
{r.status_code}")
```
3️⃣ The returned data (run ID, path)
integrates with the publishing flow for easy model registration.
⚠️ Warning: Currently supports sklearn
models only — using unsupported model types may cause errors.
✅ Result: Custom code experiments are
tracked and ready for publishing in the Model Registry.
Section 5 — Publish Model from Custom Code
The publishModel API allows users to
register models trained in custom code into the Model Registry. It validates
inputs and ensures consistency with node-based models.
1️⃣ Ensure the logging function
(logparamsAndModelFunction) has been executed before publishing. If missing,
the API will return an error.
2️⃣ Call the publishModel API with required
parameters:
```
result1 =
logparamsAndModelFunction('RandomForestRegressor',X[:5], regressor,
paramsDict,matrices)
tags = [
{"key": "1", "value": "model"},
{"key": "2", "value": "model1"}
]
publishModel("myPythonMode24",
"This delays the import until the function is called, after the modules
are fully loaded.", tags,result1)
```
3️⃣ For external publishing, use
publishModelExternally with valid sessionKey and headers.
```
headers = {
"content-type":
"application/json",
"accept":
"application/json",
"authorization": sessionKey,
"X-Csrftoken": Csrftoken
}
data = {
"sessionKey": sessionKey,
"pipelineName": pipelineName,
"projectName": projectName,
"workspaceName":
workspaceName,
"inputData": X[:5],
"taskName": taskName,
"modelObj":
model_base64,
"parameters": params,
"performanceMatrix": metrics,
"confusionMatrixDF":
conf_matrix,
"entityType":entityType
}
api =
backend_url + "models/logparamsAndModelFunction/"
r =
requests.post(api, headers=headers, data=json.dumps(data, default=str))
externalResponse
= r.json()
data =
externalResponse.get('data')
data['modelName']
= "siddharth15"
data['tags'] =
tags
data['description']
= "jcsjc agjhsadcxvsh v xav gav xdagvxyga"
api =
backend_url + "models/publishModelExternally/"
res =
requests.post(api, headers=headers, data=json.dumps(data, default=str))
res = res.json()
``
✅ Result: The model appears in the registry
with unique ID, metadata, and version details.
Section 6 — Model Deployment for Custom Code
This feature allows users to load,
validate, and use trained model instances directly through a custom Python
method — getModelObject(modelName, version) — within Rubiscape’s Pro Code
environments. It enables seamless model reuse in both internal workflows and
external environments.
Scope
The functionality provides the ability to:
- 🔹 Load the correct model instance and its related parameters from the Model Registry.
- 🔹 Validate that the requested model name and version exist and load correctly.
- 🔹
- 🔹 Load the correct model instance and its related parameters from the Model Registry.
- 🔹 Validate that the requested model name and version exist and load correctly.
- 🔹
Use
the loaded model for:
- Predictions inside RubiPython.
- Integration in Rubiscape workbook or
pipelines.
- External usage or downloading model
files when needed.
Pipeline Overview
1️⃣ Create a Pipeline / Workbook in
Rubiscape.
2️⃣ Connect a Reader Node to a Pro Code
Node.
3️⃣ Call the custom function:
```python
model_data = getModelObject("Adaboost_desktop", "1")
model = model_data['regressionObject']
yPred = model.predict(X_test)
print2log(yPred)
```
🔹
model_data = getModelObject("Adaboost_desktop", "1")
model = model_data['regressionObject']
yPred = model.predict(X_test)
print2log(yPred)
```
🔹
Returns model instance, parameters, and metadata.
4️⃣ Run the workbook or pipeline to
validate the model.
5️⃣ View validation results and generated
output metrics.
Implementation Details
Function definition:
```python
def getModelObject(modelName: str, version: str):
"""
Loads a trained model instance, parameters, and metadata based on model name and version.
Returns: tuple(modelInstance, fields)
"""
```
💡 The method ensures backward compatibility with models deployed through earlier MLOps versions.
⚠️ Displays an error if the specified model or version does not exist.
✅
All model
loading operations and errors are logged for traceability.
Usage Options
- In Workbook / Pipeline: Drag, configure,
and run the model node.
- In Model Section: Configure the model settings and execute for inference or
analysis.
Result
The selected model is loaded and validated
successfully. Users can perform predictions, further analysis, or export
results using the loaded model instance
Related Articles
Task Wise GPU Integration for Machine Learning Algorithms.
Overview GPU execution support has been introduced for supported Machine Learning algorithms to improve processing performance, execution efficiency, and scalability for machine learning workloads. Users can now enable GPU execution at task level for ...Support Vector Machine in Regression
The location of the Support Vector Machine is under Machine Learning in Regression on the feature studio. Alternatively, use the search bar to find Support Vector Machine (SVM) algorithm. Use the drag-and-drop method or double-click to use the ...Working with Dataset Operations
In Data Dictionary, the features of the selected dataset are displayed in the PREVIEW pane. You can perform some operations on these features to show/hide them, modify them, change/view the properties, and so on. Performing Dataset Operations To ...Incremental Learning
Incremental Learning is located under Textual Analysis ( ) in Clustering, in the left task pane. Use the drag-and-drop method to use the algorithm in the canvas. Click the algorithm to view and select different properties for analysis. Refer to ...Incremental Learning
Incremental Learning is located under Textual Analysis ( ) in Clustering, in the left task pane. Use the drag-and-drop method to use the algorithm in the canvas. Click the algorithm to view and select different properties for analysis. Refer to ...